
How to Connect a Zebra ZD421 Label Printer to WiFi
Posted by barcodes.com.au on Jun 02, 2026
Below is a step by step guide for how to connect the Zebra ZD421 WiFi / Bluetooth Model Desktop Label Printer to Wifi. For more information please contact us at 1300 800 999 or email sales@barcodes.com.au
Media Checklist
Make sure you have the following items before starting:
- ZD421 WiFi model
- Power adapter
- Power cord
- Mobile Phone (for Zebra Printer Setup App)
- USB connectivity cord (needed for setup without phone)
- Thermal label roll
- *Ribbon; only if your printer is a Thermal Transfer model
Note: You will want to set your printer up with labels before starting as you will need to perform test prints.
Note: Some information in these instructions have been redacted as they may be sensitive such as; WiFi Passwords, IP Addresses and Unique Serial Numbers. You should still be able to follow along by inserting your data in place of the redacted data.
WiFi Setup via Zebra's Printer Setup Phone App
Step 1: Download and Install Zebra's Printer Setup App on a Mobile Device
App Store:
https://apps.apple.com/np/app/zebra-printer-setup-utility/id1454308745
Google Play:
https://play.google.com/store/apps/details?id=com.zebra.printersetup&hl=en&gl=US&pli=1
Step 2: Turn Bluetooth and WiFi On
Go into your phone/device settings and turn on your Bluetooth and WiFi so it is ready to pair to your printer and connect to the internet.
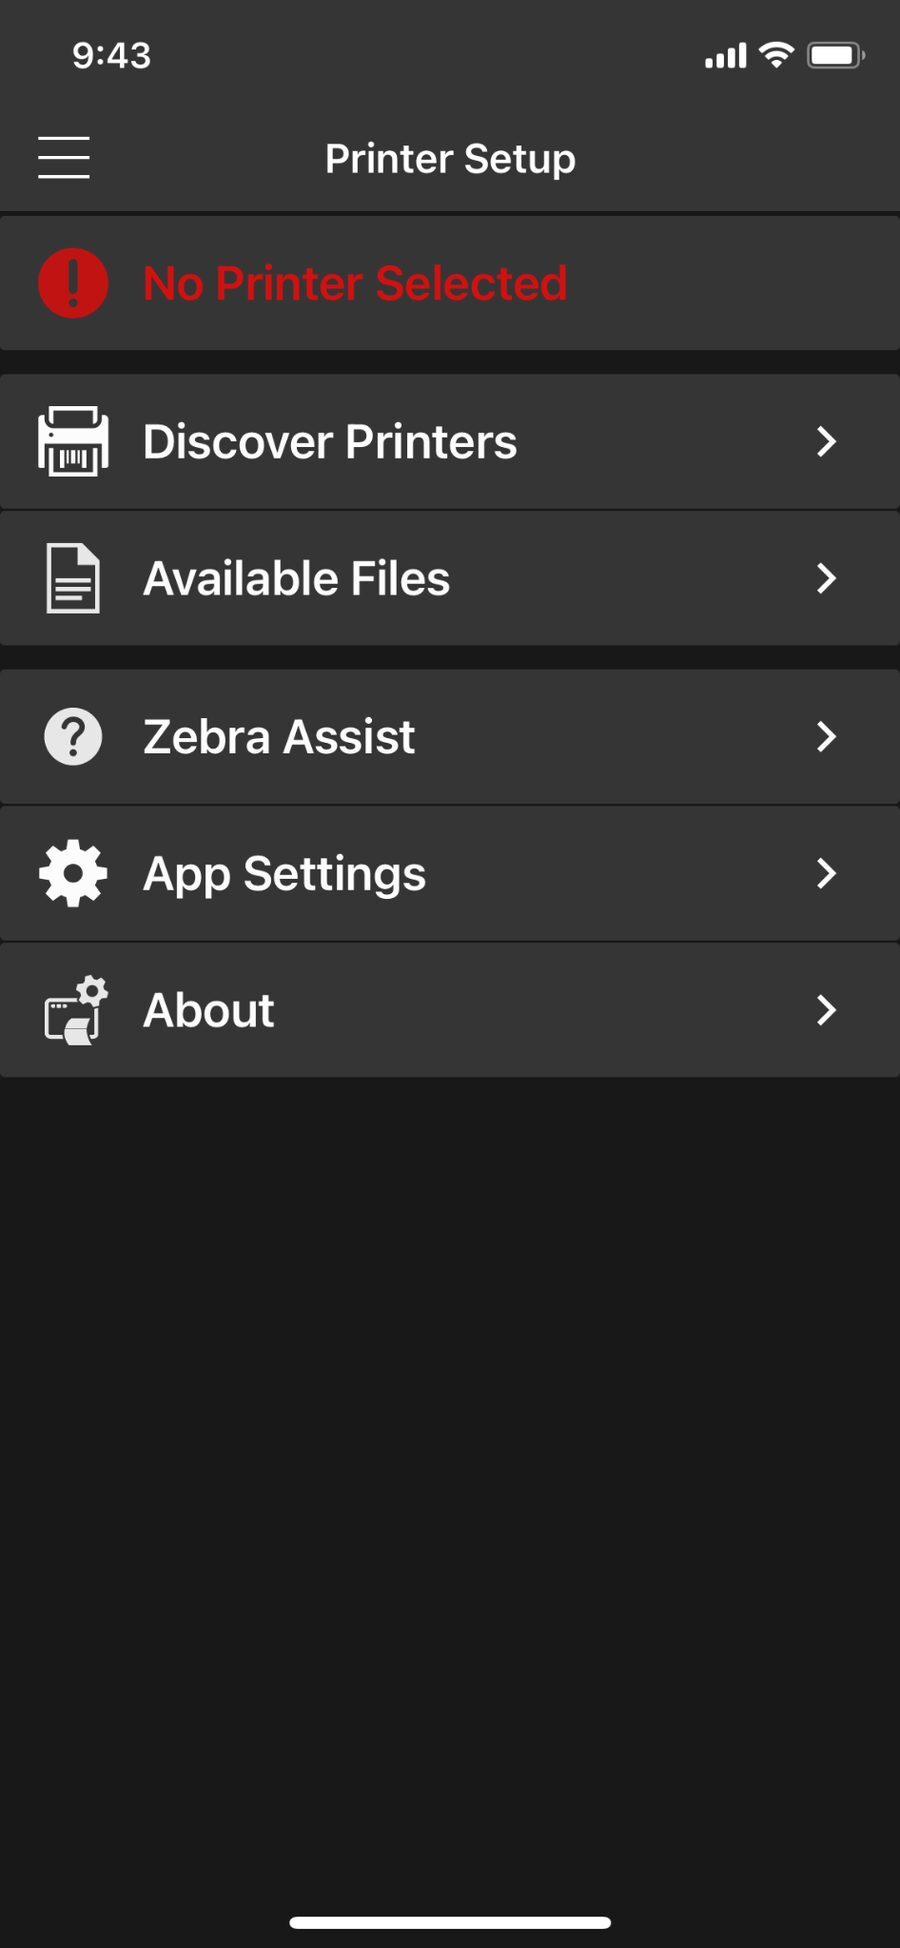
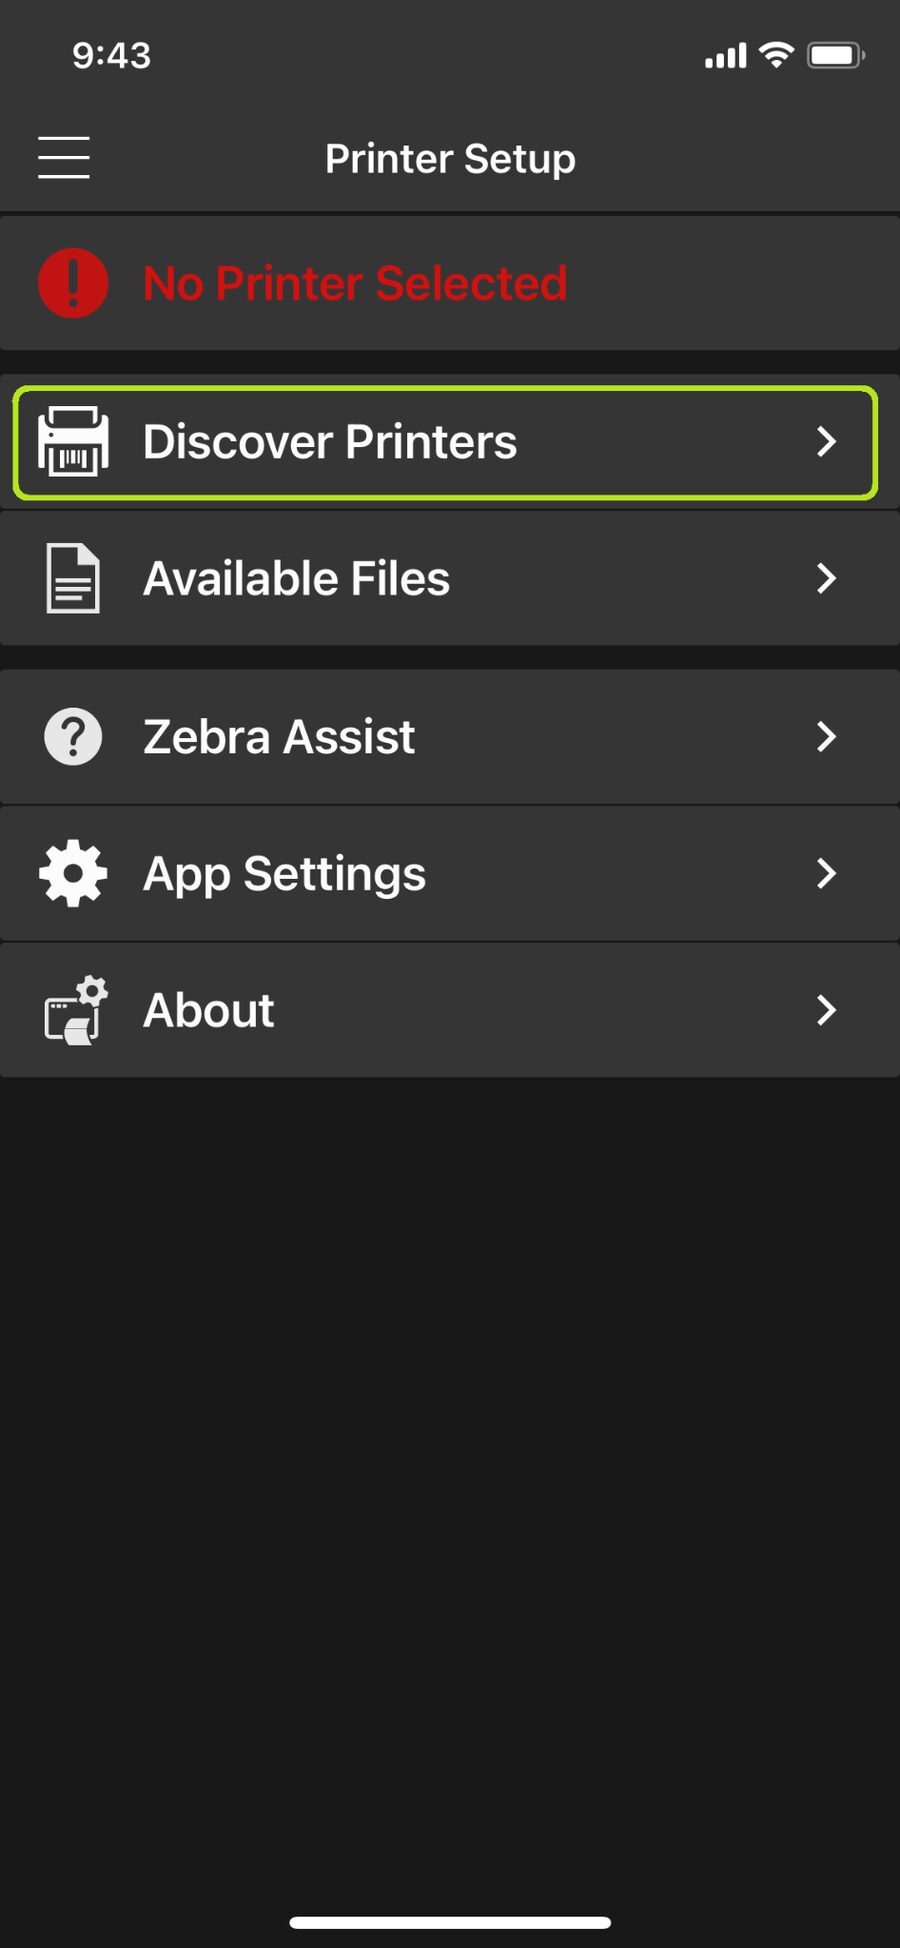
Step 3: Discover Printers on Printer Setup App
Open the Zebra Printer Setup App and navigate to the 'Discover Printer' tab. As we have not yet turned on our printer there will likely be no discoverable devices yet.
 |
 |
 |
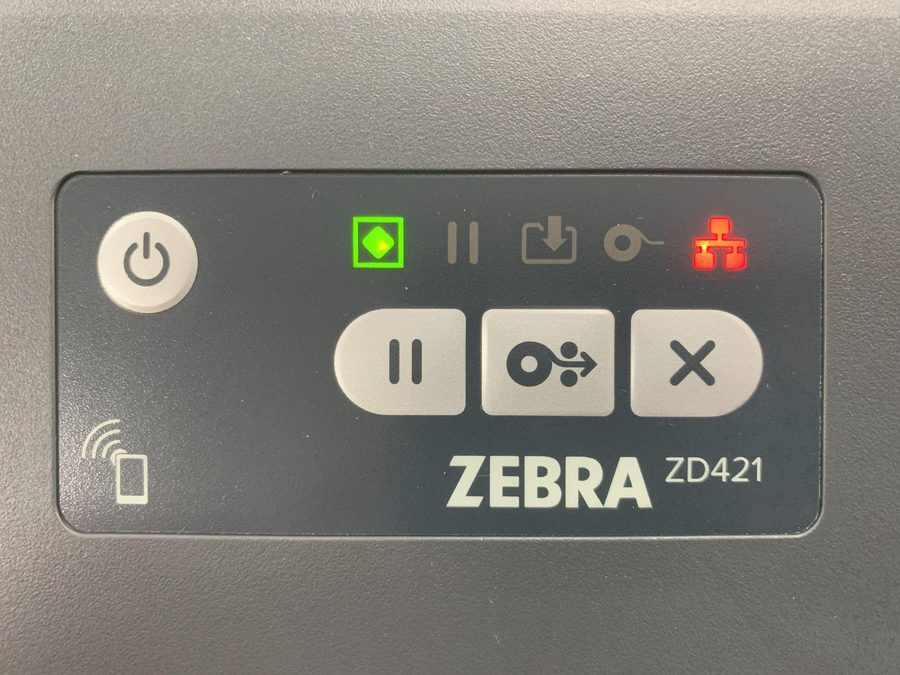
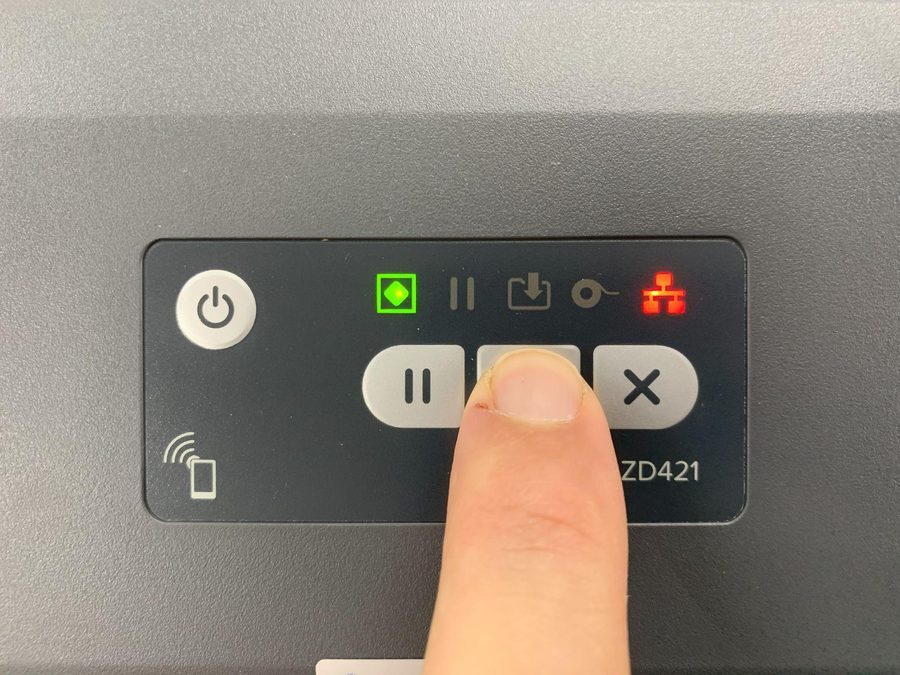
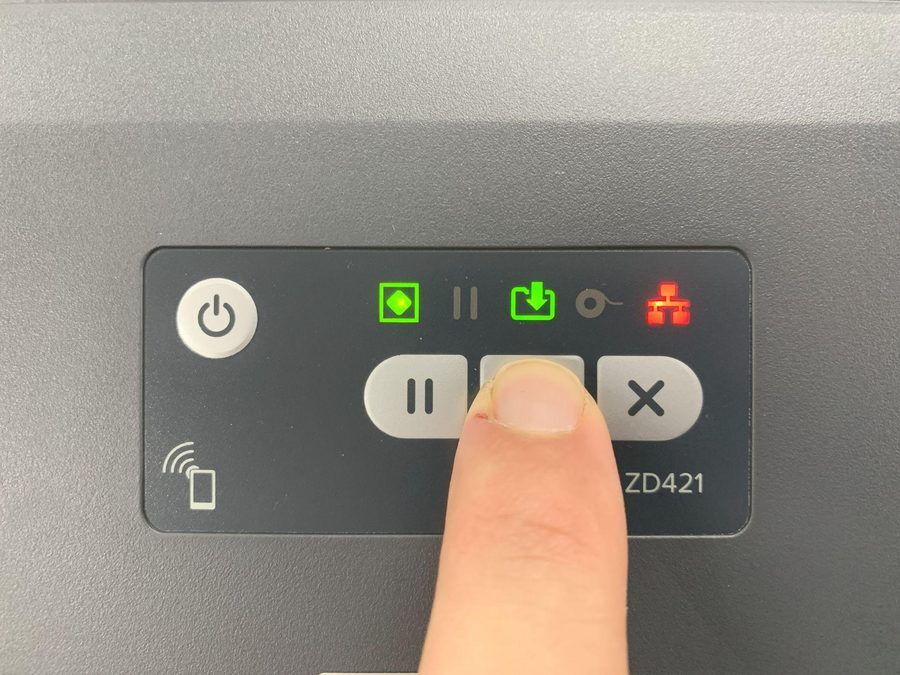
Step 4: Activate Bluetooth Pairing on the Printer
Use the power adapter and power cord to plug the printer into a wall power outlet. Power up the printer by pressing the power button located to the top left corner of the panel.
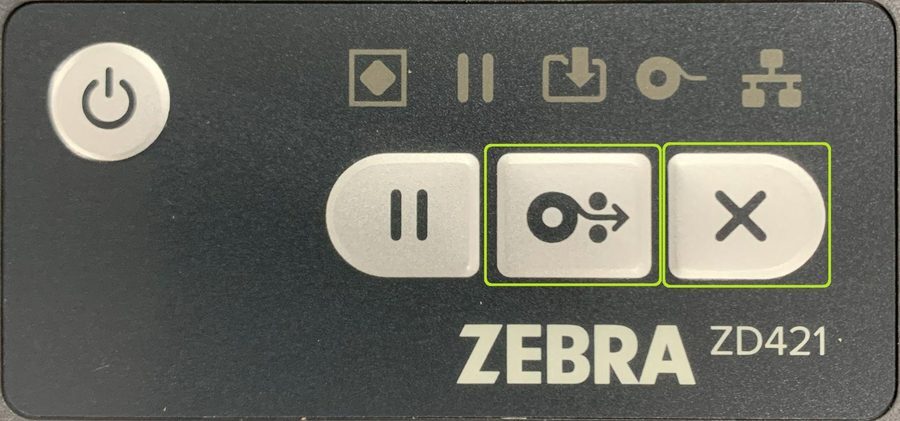
To turn your printer's Bluetooth Low Energy (BLE) pairing on; press and hold the middle button on the panel for 7 seconds until the middle incoming data icon flashes green.
 |
 |
 |
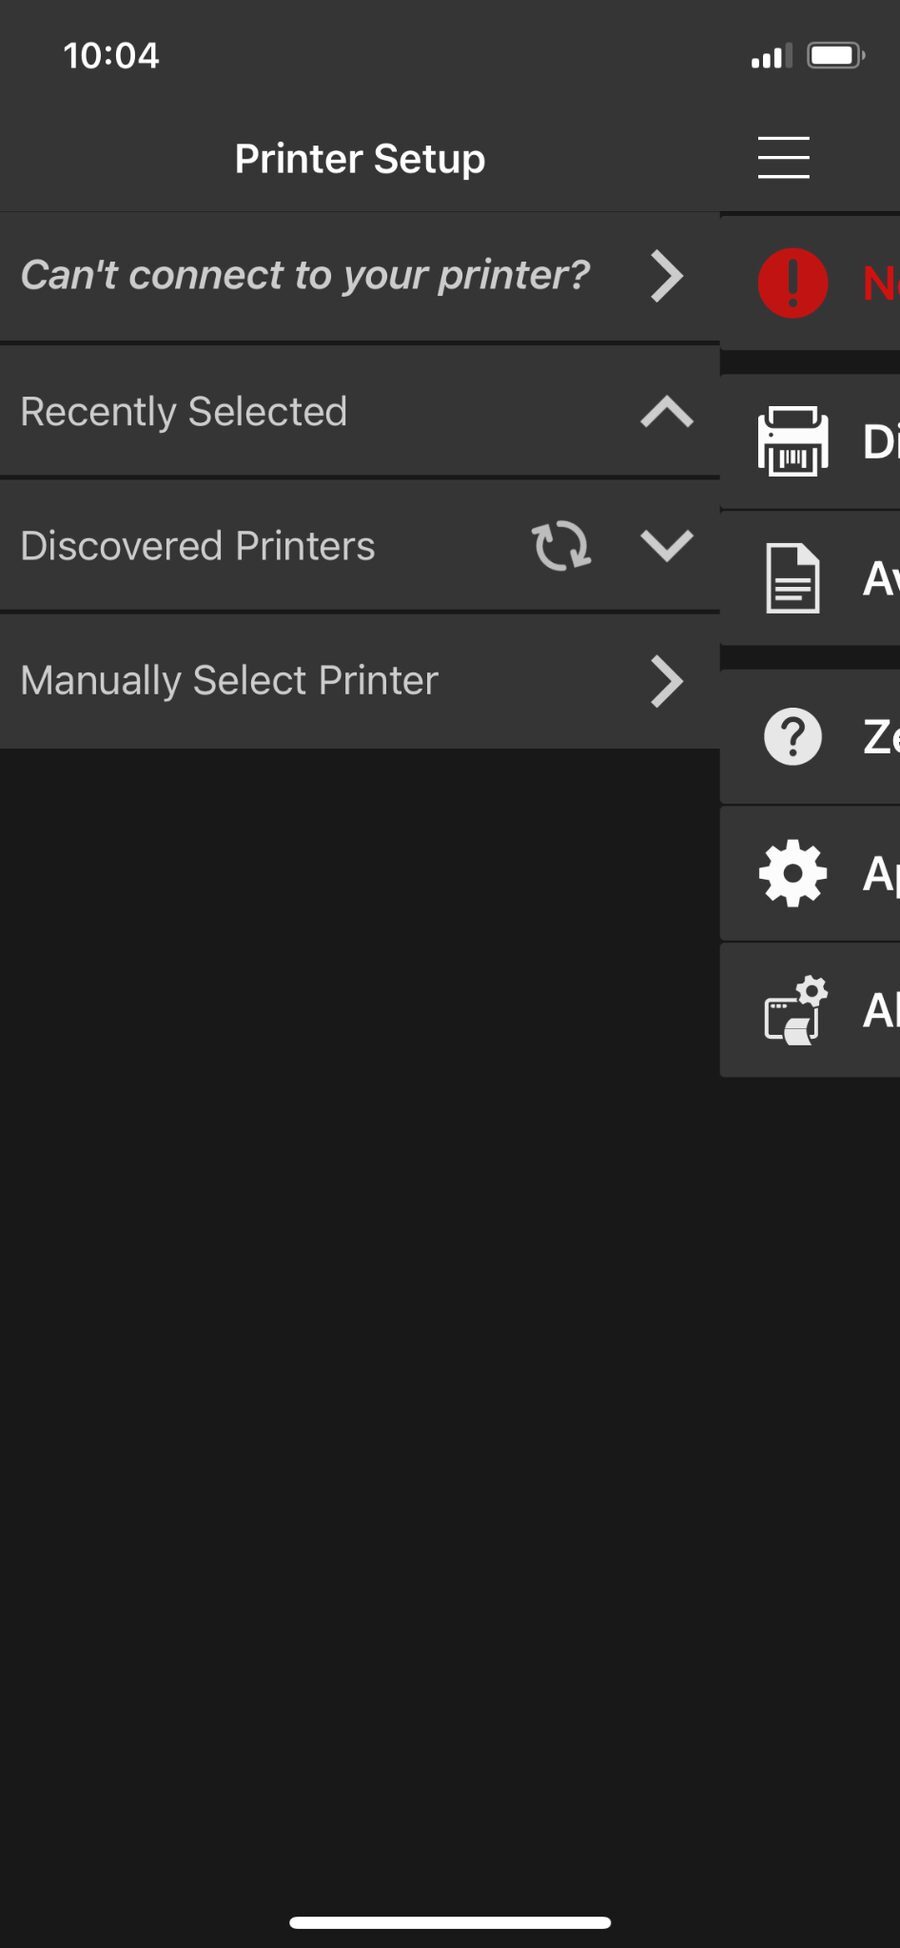
Step 5: Pair Printer to your Device in the Printer Setup App
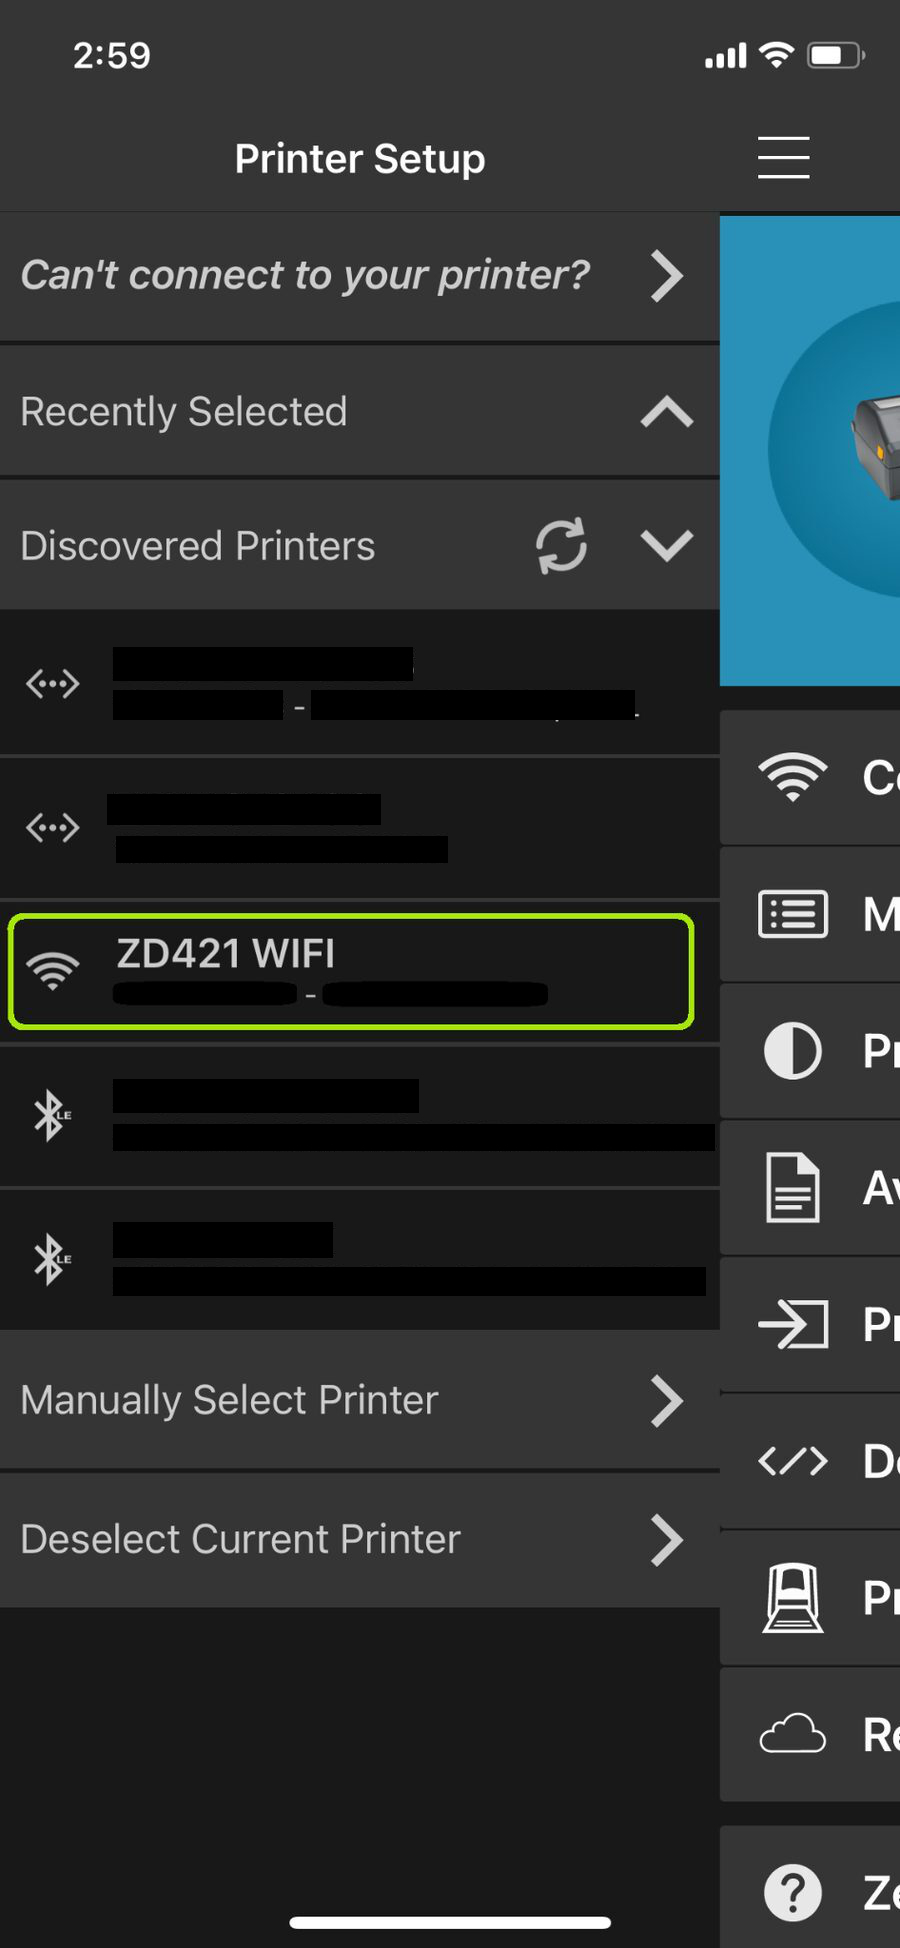
Go back to the Zebra Printer Setup phone app and refresh the 'Discover Printer' tab. You should eventually see your printer as a discoverable Bluetooth Low Energy (BLE) device. The discoverable device will usually be identified by its serial number. Tap/click on the printer you want to connect.
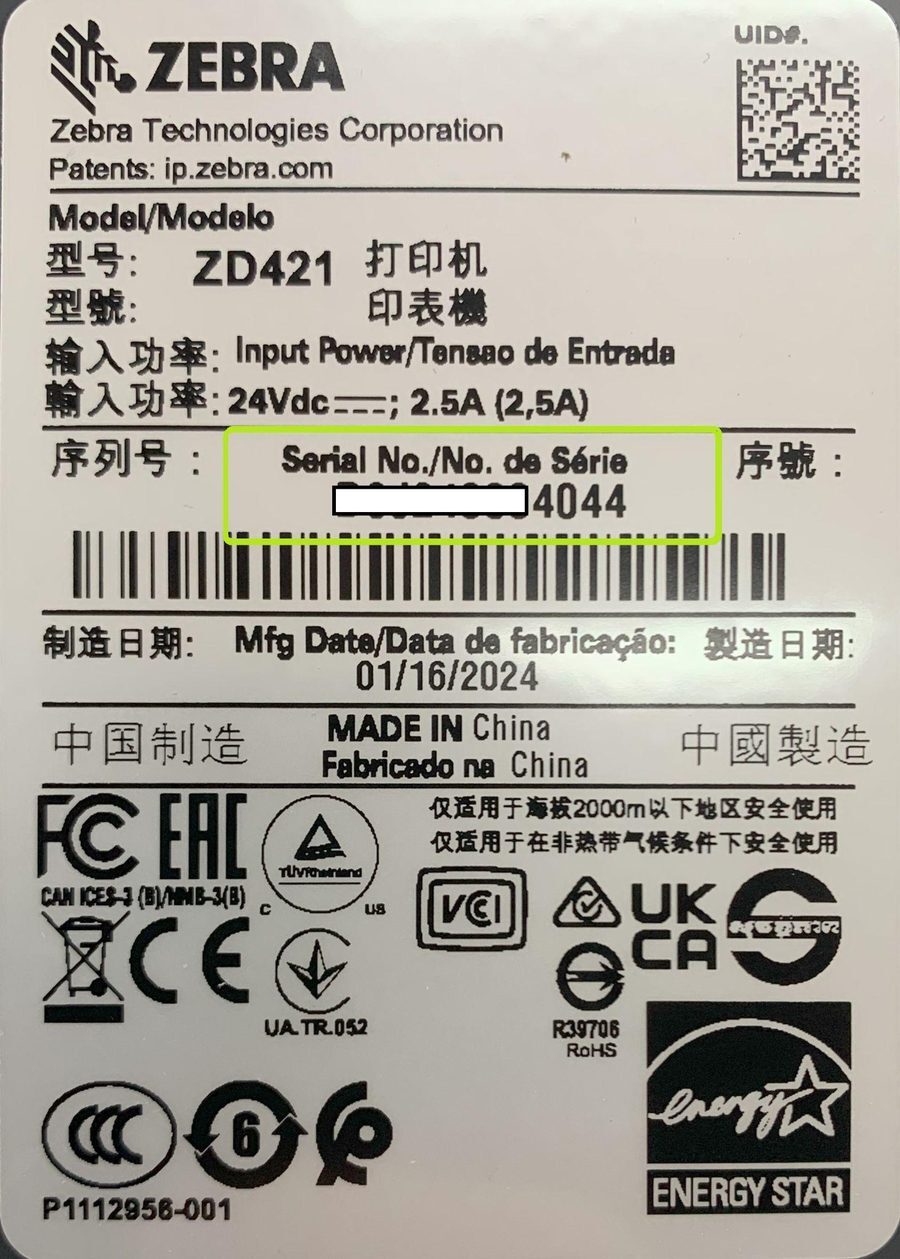
Side Note: Printer Serial Number
You can find your printer's serial number at the bottom of the printer. This will help if multiple devices are discoverable by Bluetooth and ou need to find the correct one.
 |
 |
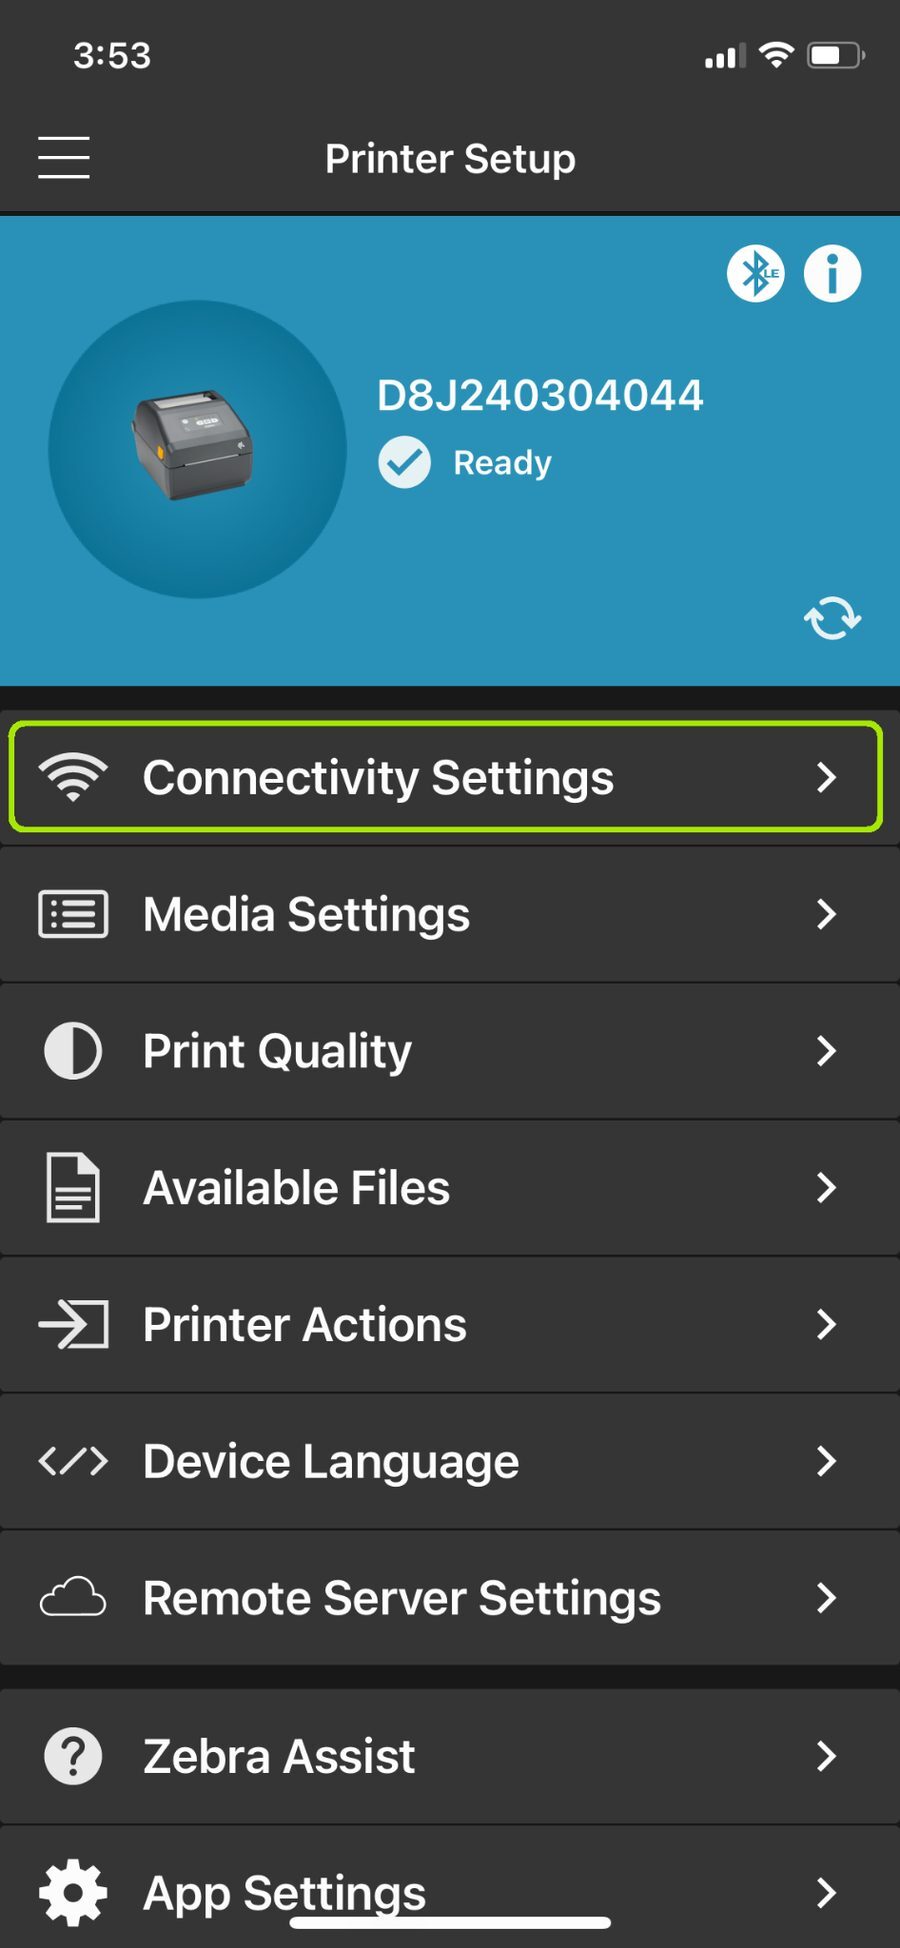
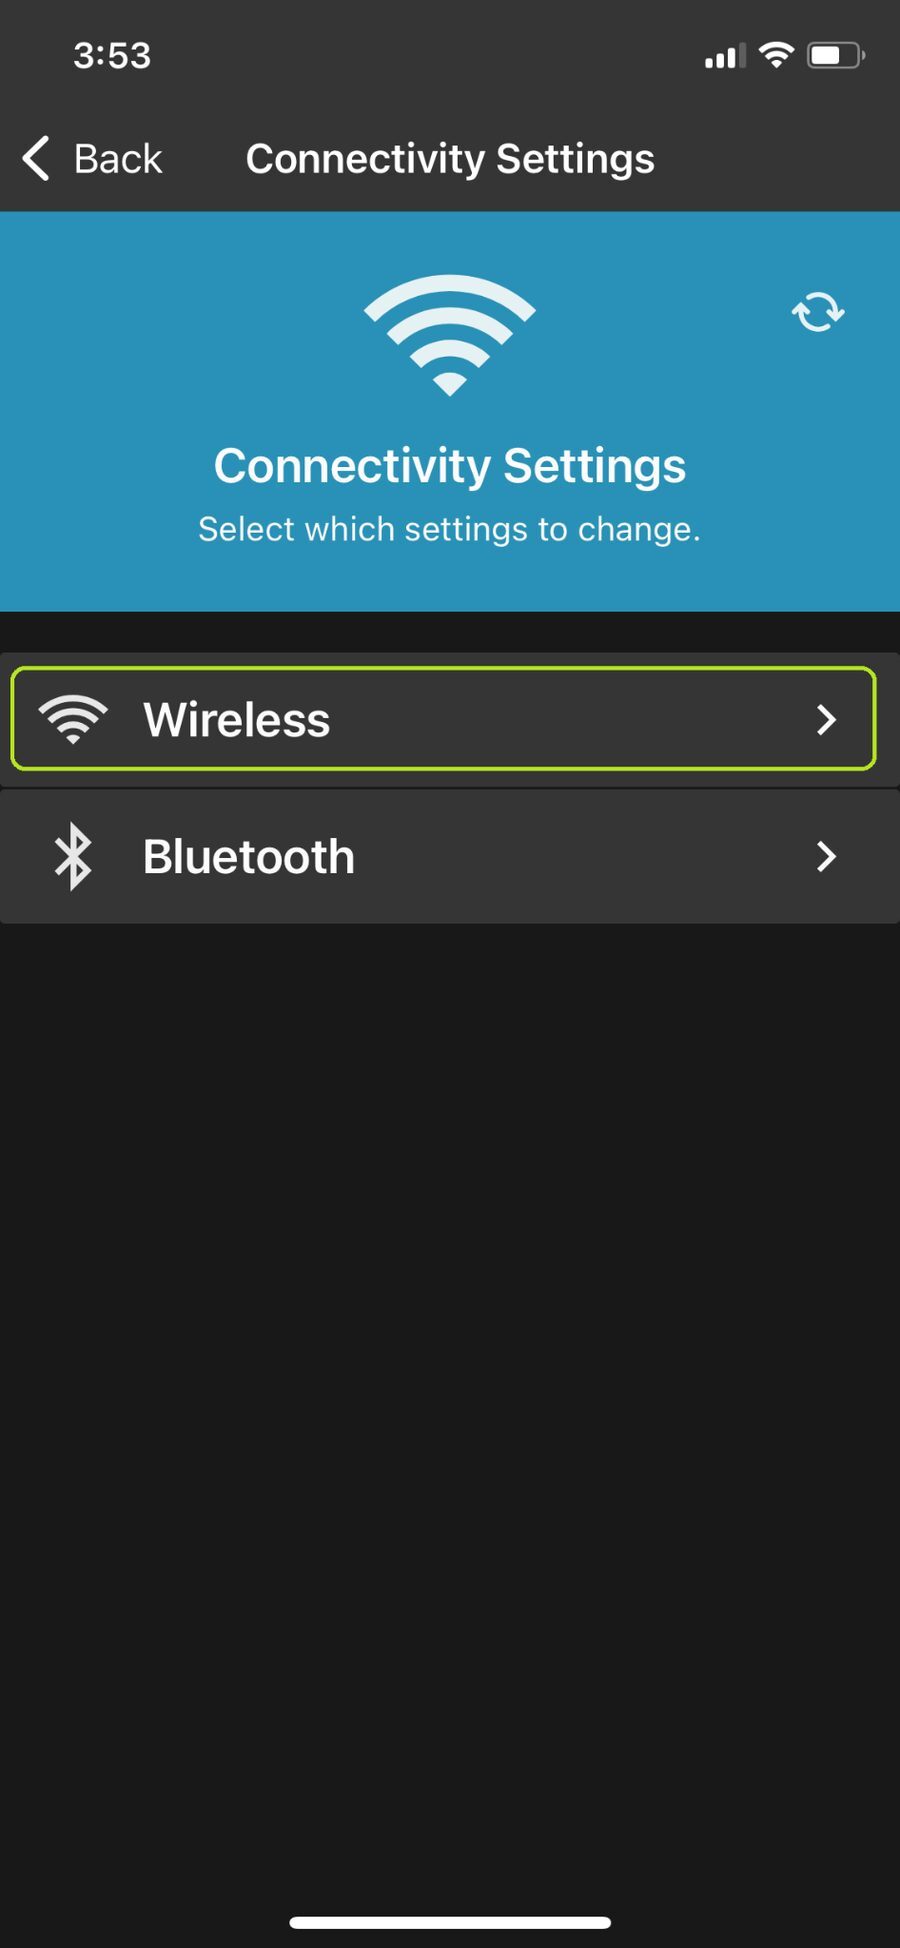
Step 6: Go to Connectivity Settings
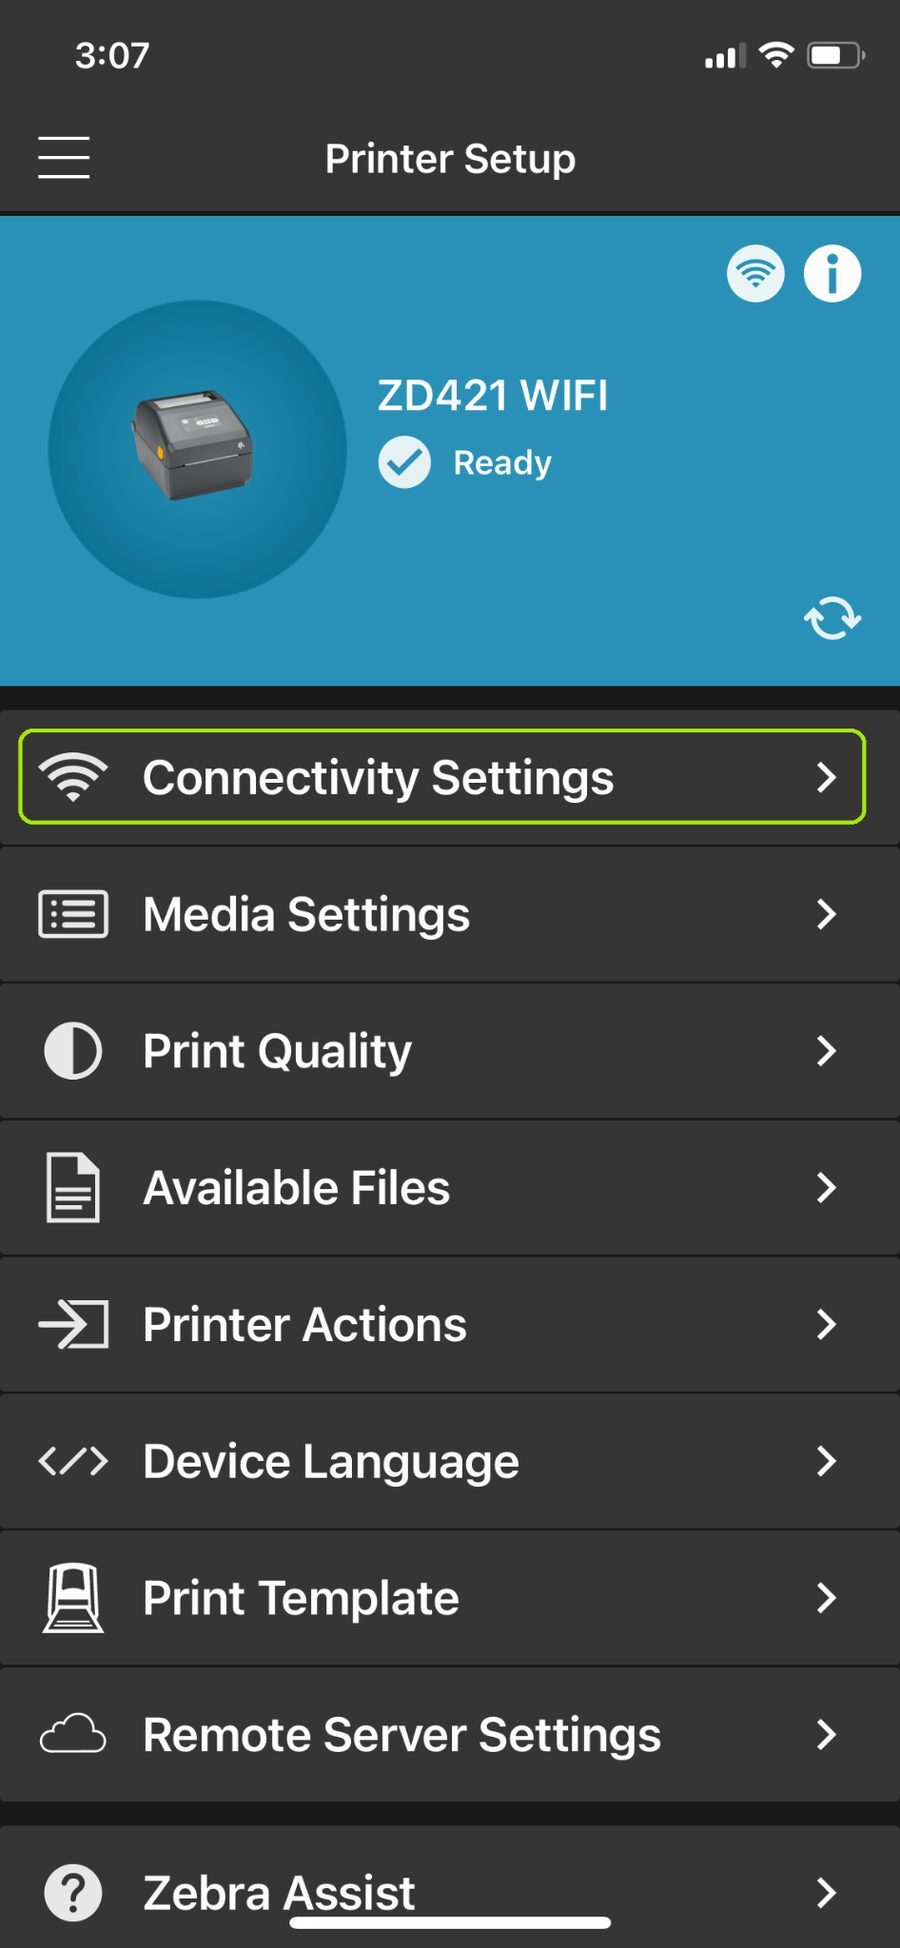
Once the printer is connected, go to 'Connectivity Settings' and then select 'Wireless'. From here, you will be able to set up the WiFi connection for your printer.
 |
 |
Step 7: Setting up the WiFi Connection (DHCP)
The following screenshots show the steps to set up the DHCP Wi-Fi Connection. For these steps you will need to fill out your own WiFi details including your WiFi Network Name and WiFi Password.
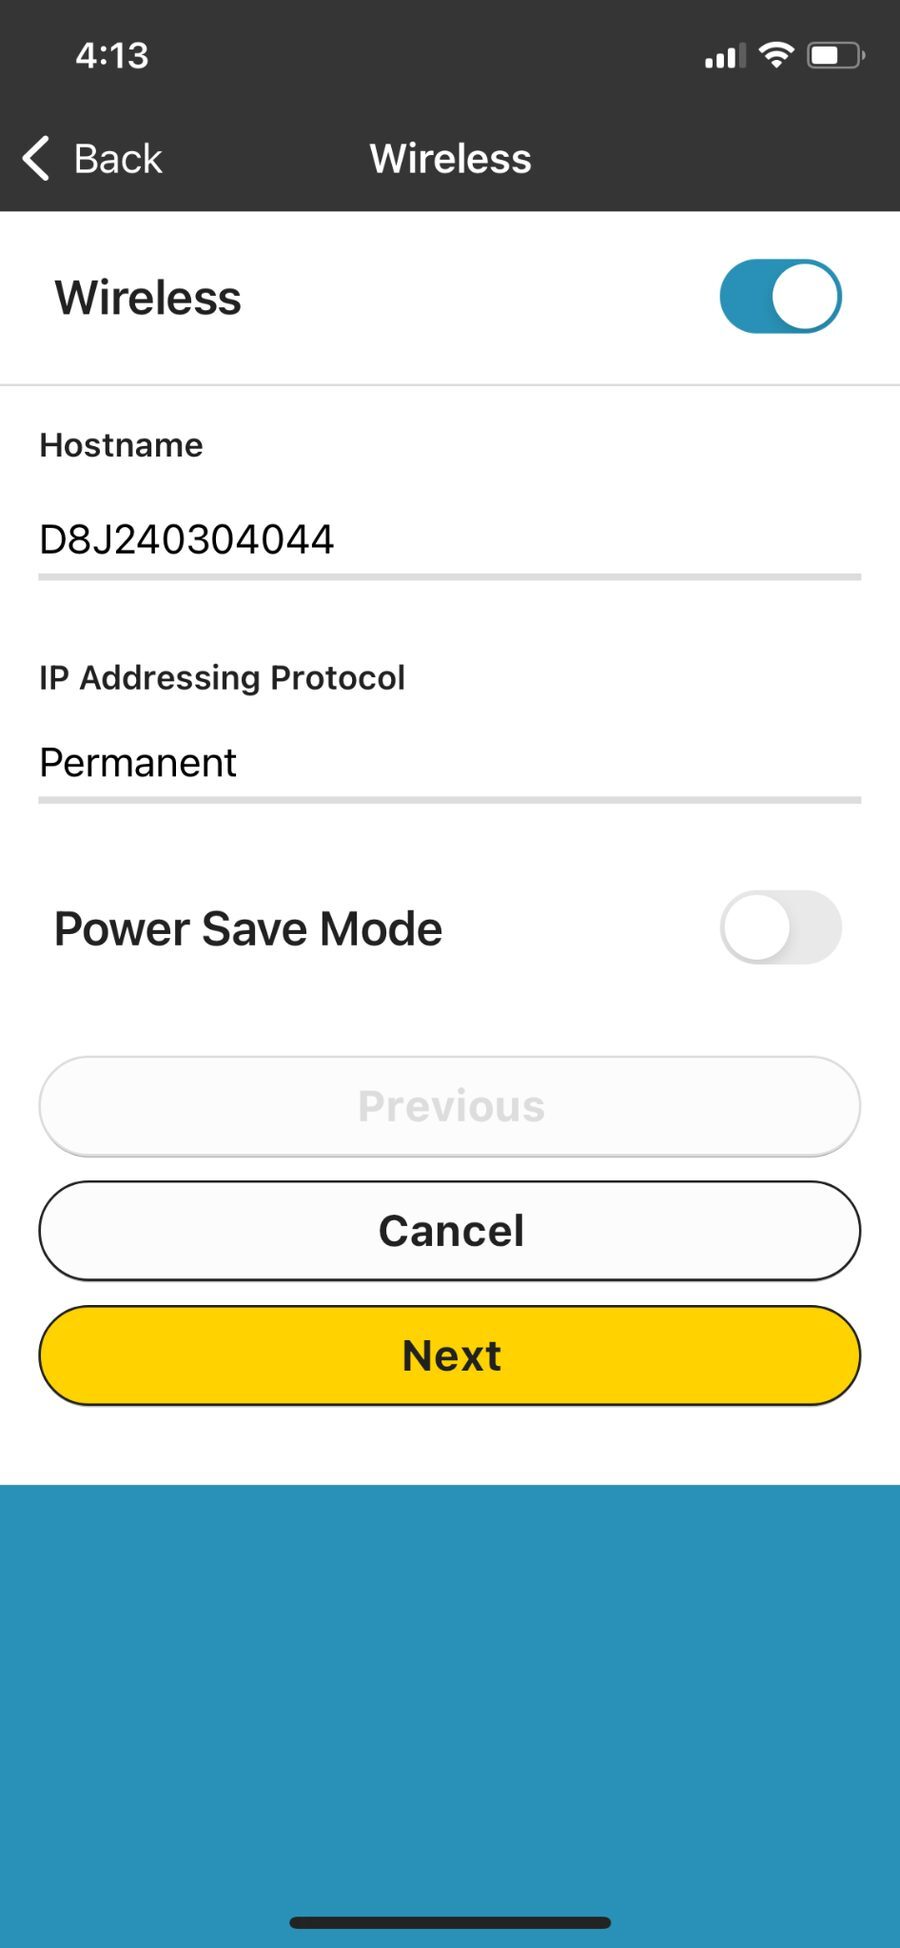
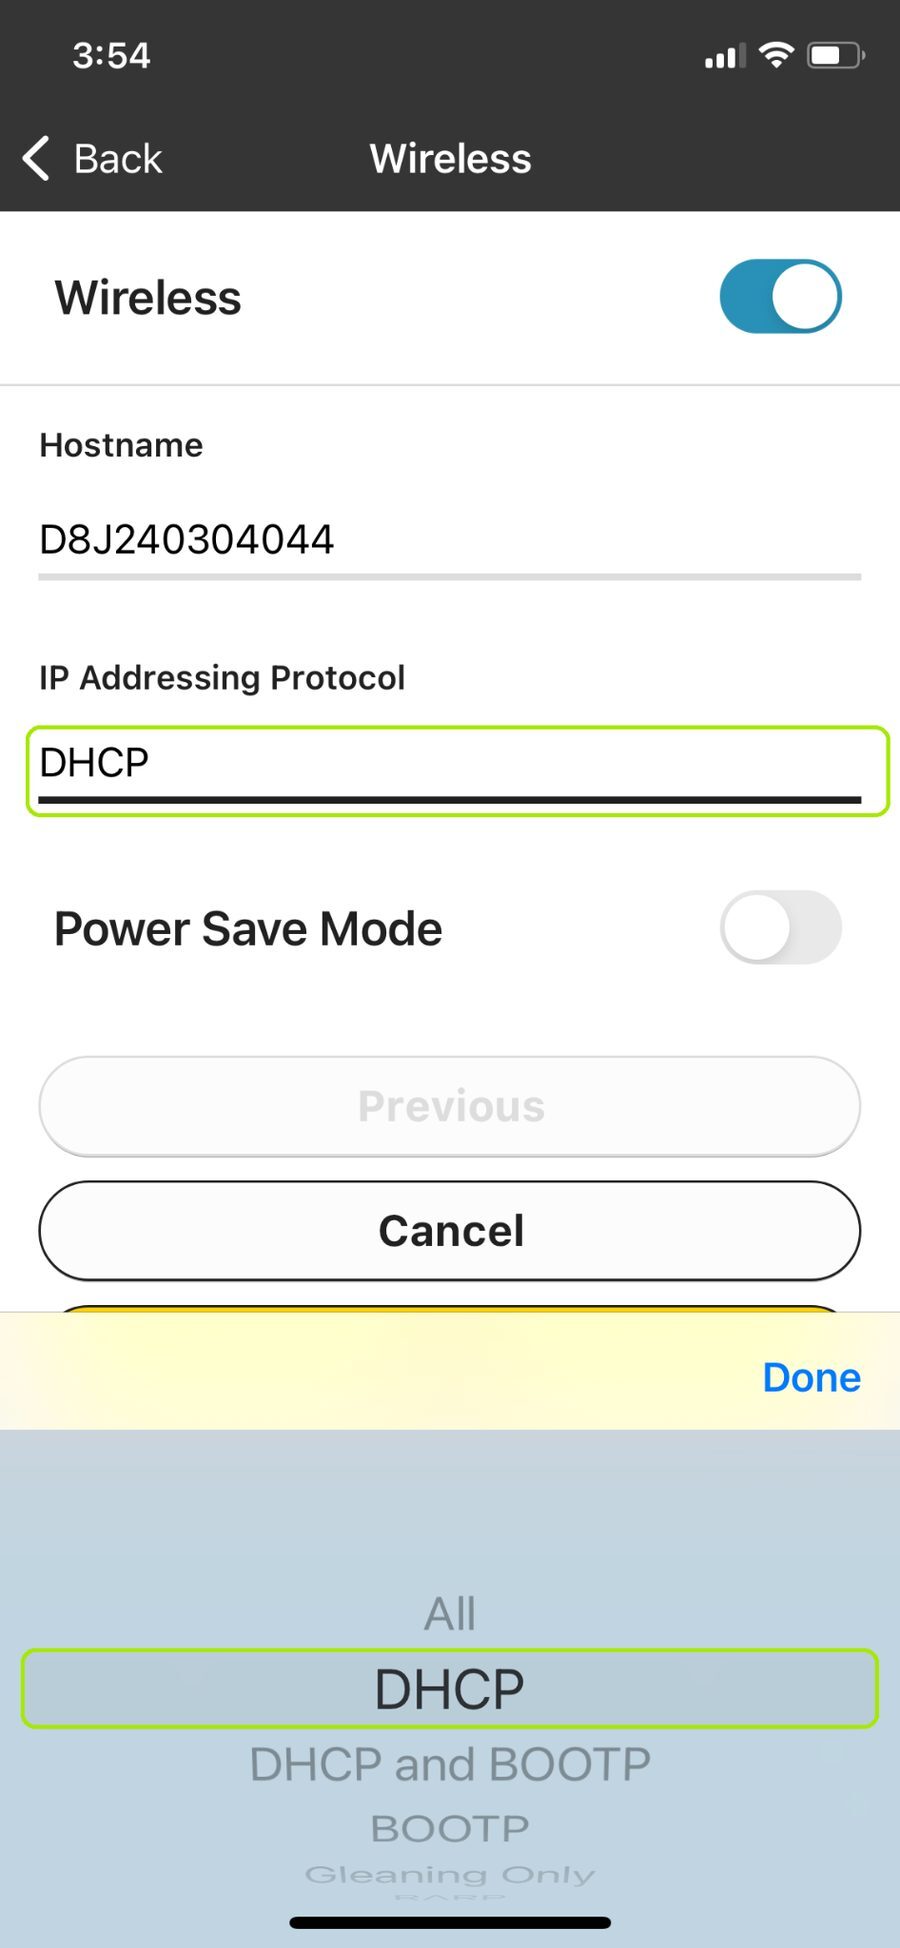
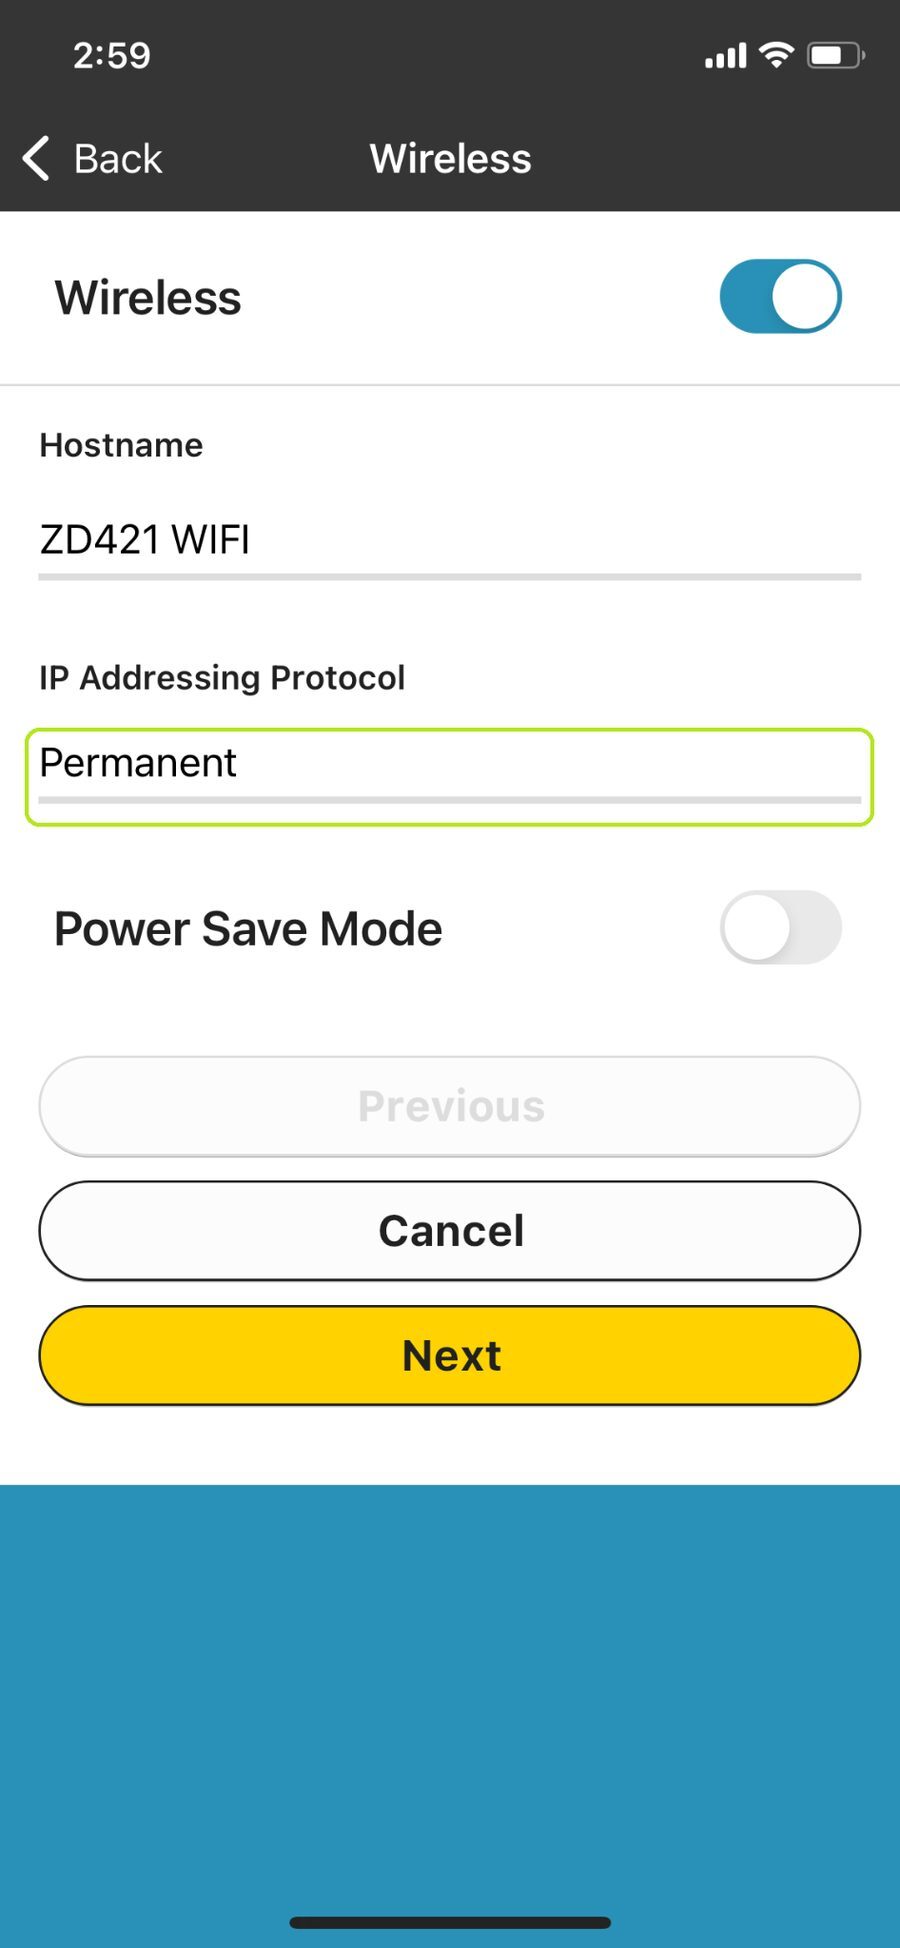
Step 7 Part A:
First change the IP Addressing Protocol to DHCP.
(Optional) Rename the Hostname to something easy to remember like 'ZD421 WIFI'.
 |
 |
 |
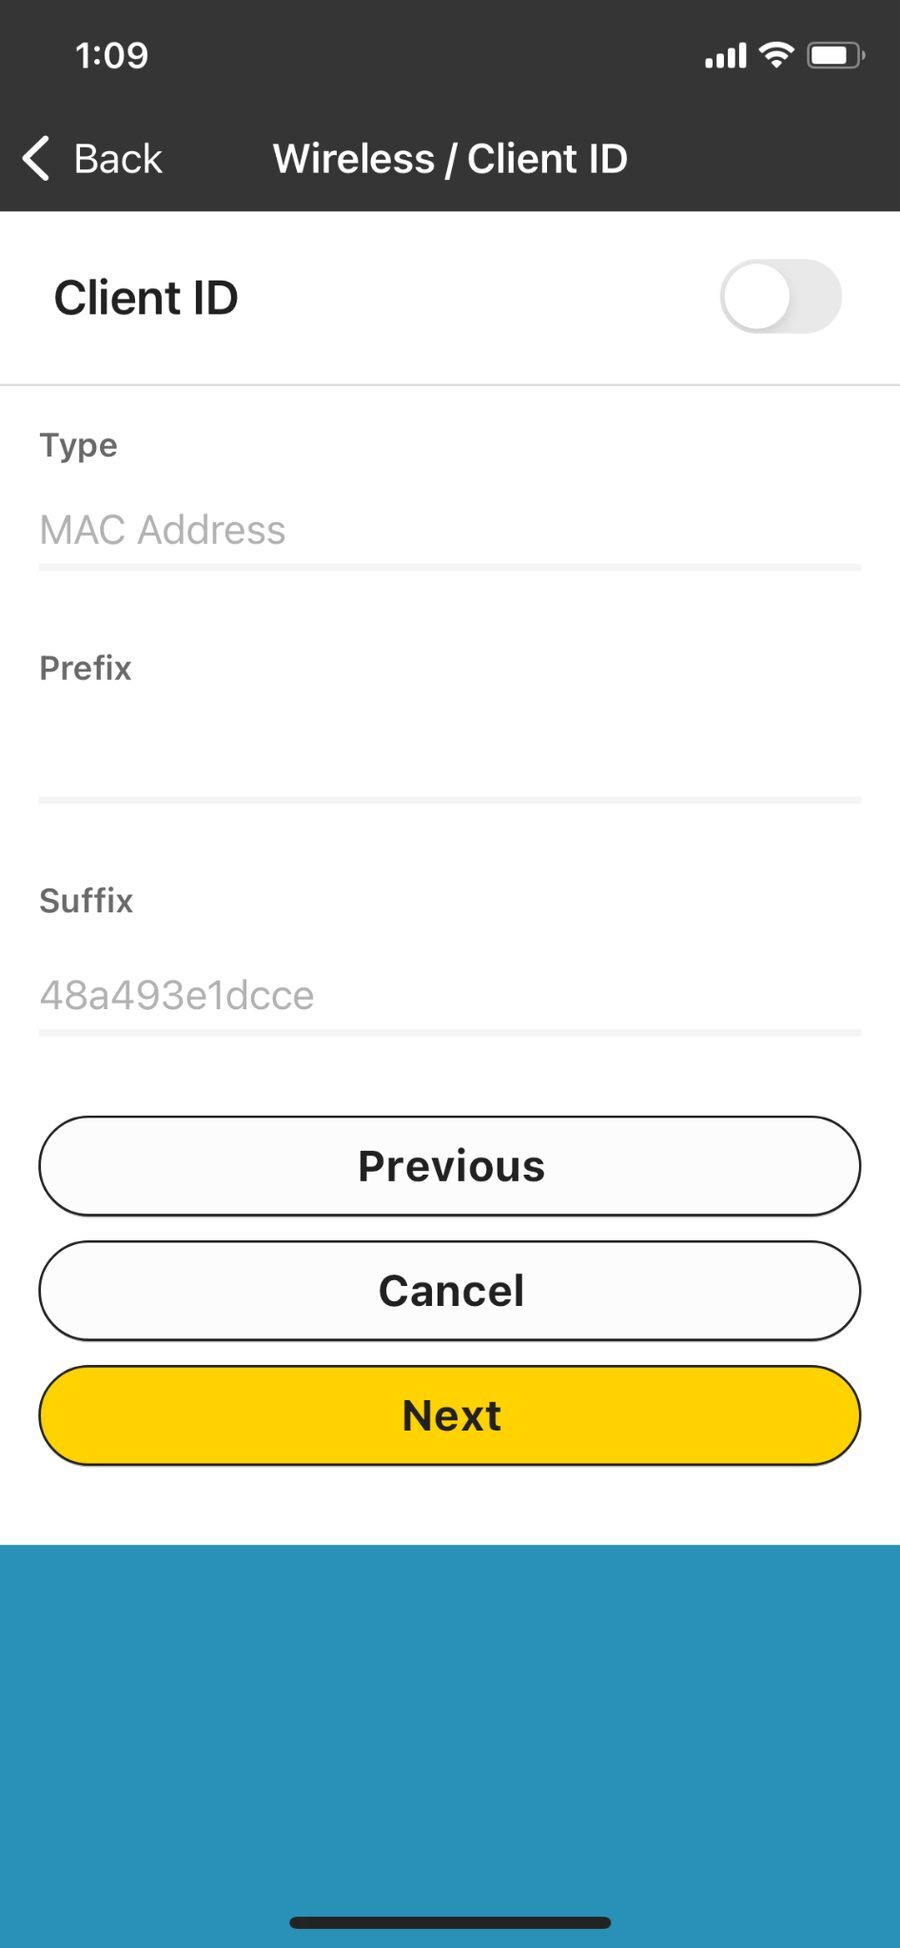
Step 7 Part B:
The next screen will show you Client ID options. Leave this as default/blank and go straight to the next step.
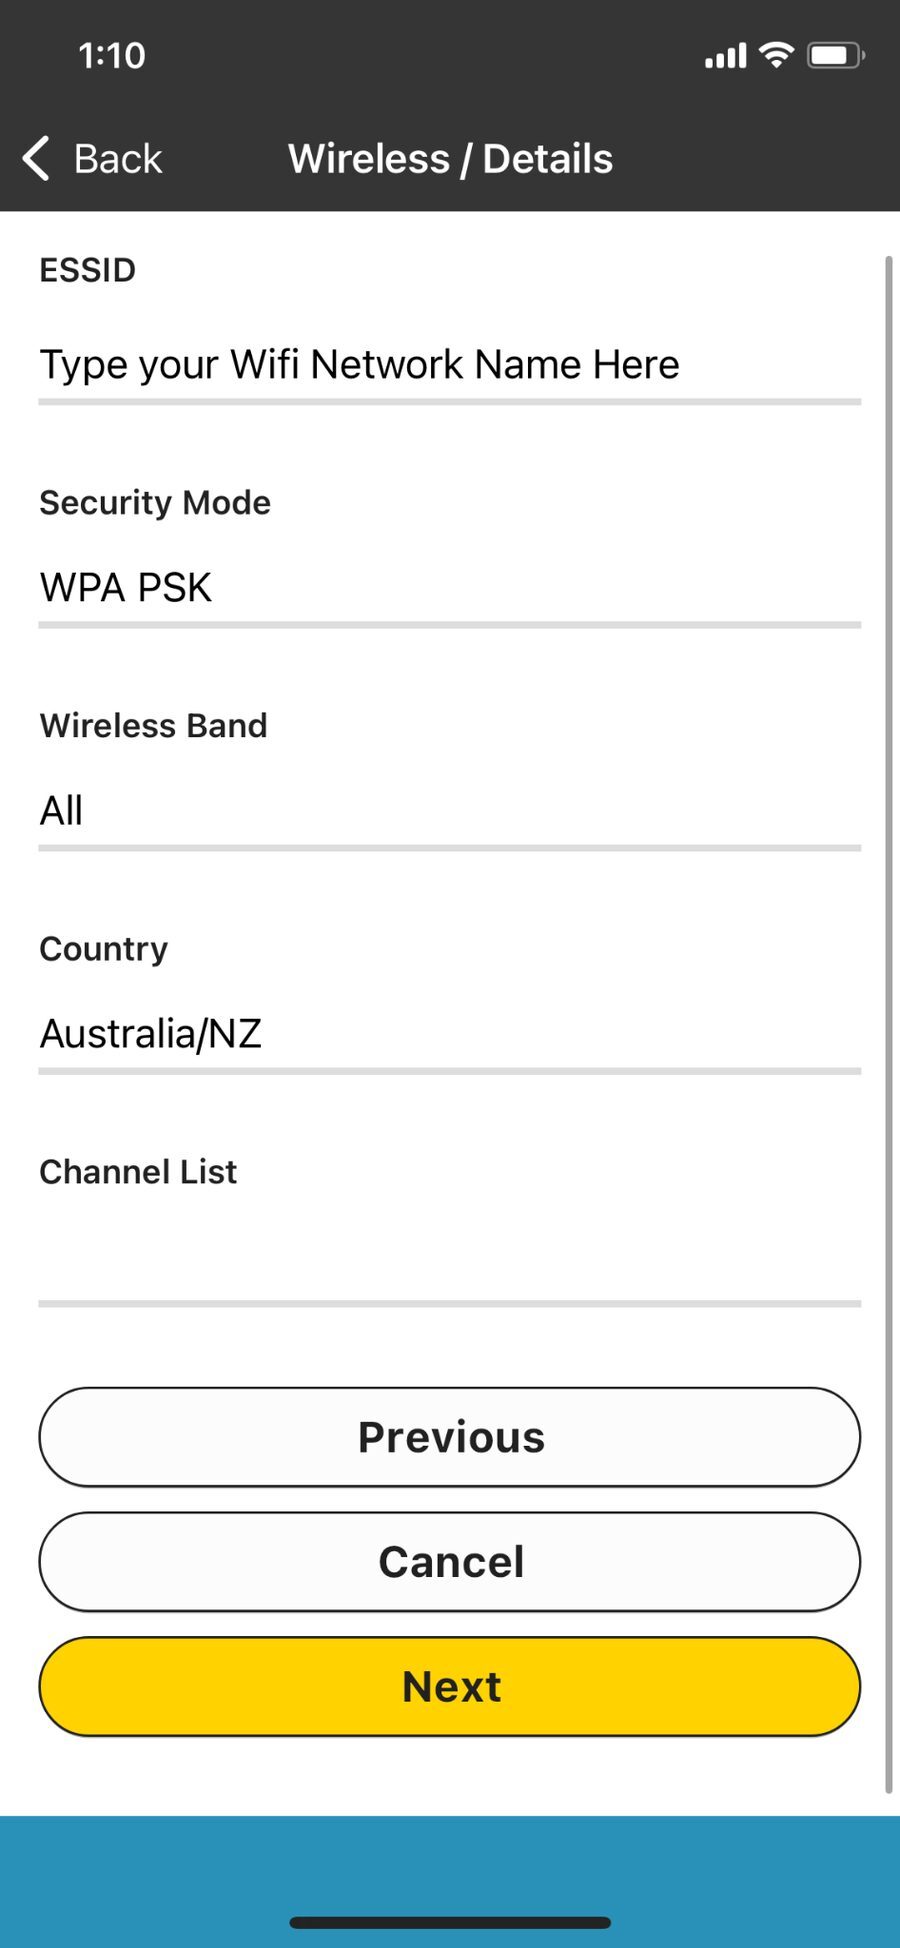
Step 7 Part C:
ESSID: Fill out your WiFi's Network Name. This is the same network name that your device or work computer is connected to.
Security Mode: Select 'WPA PSK'. This setting will allow you to type in your WiFi Password at a later step to connect your printer.
Wireless Band: Select 'All'.
Country: Select 'Australia/NZ' or the country you are operating from.
Channel List: Leave blank.
Once these steps are complete press 'Next'.
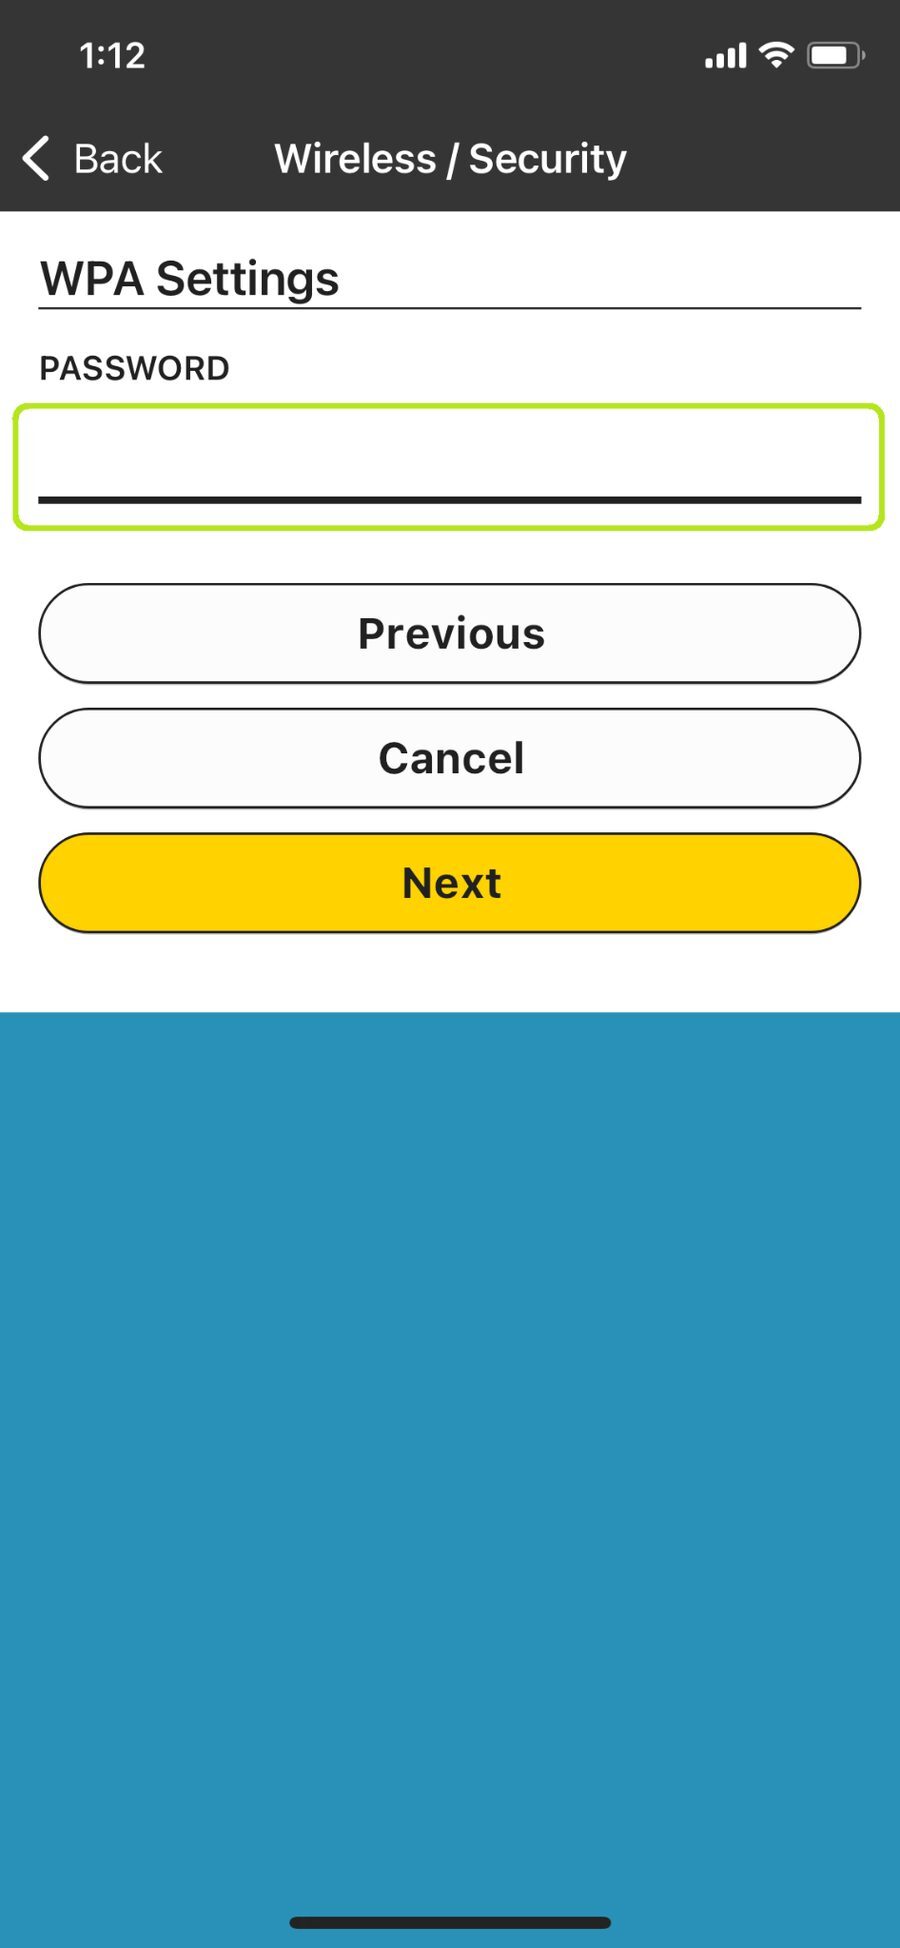
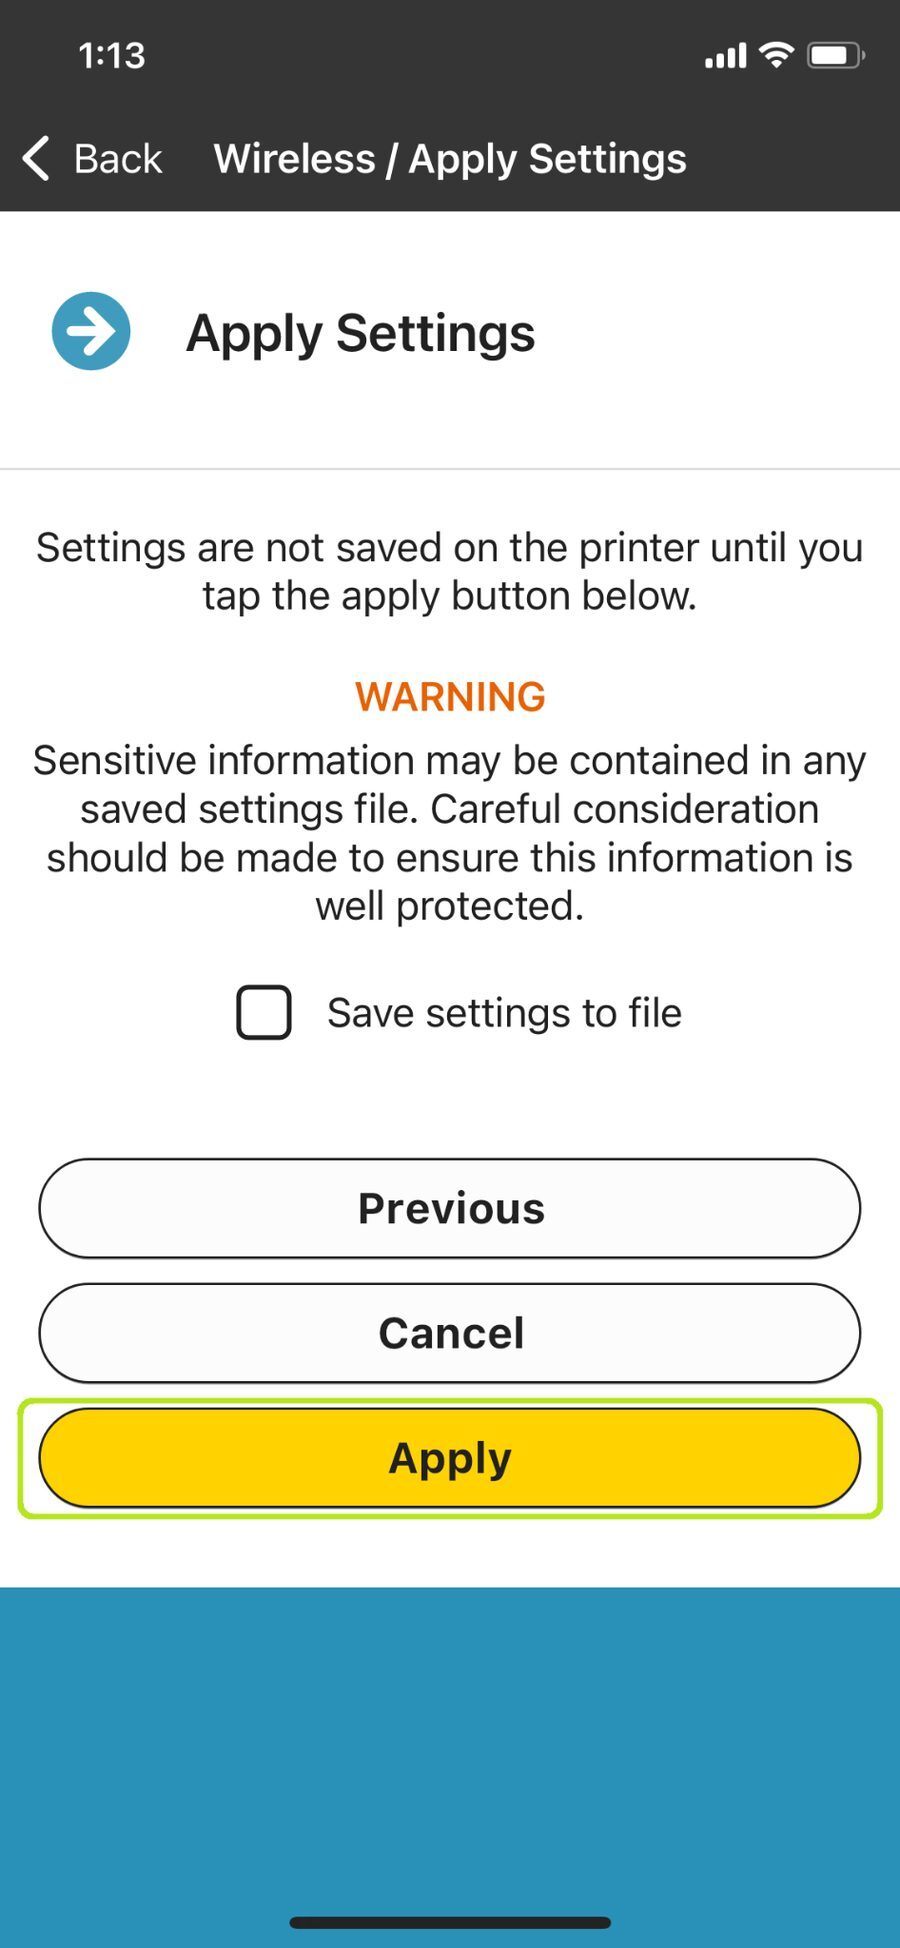
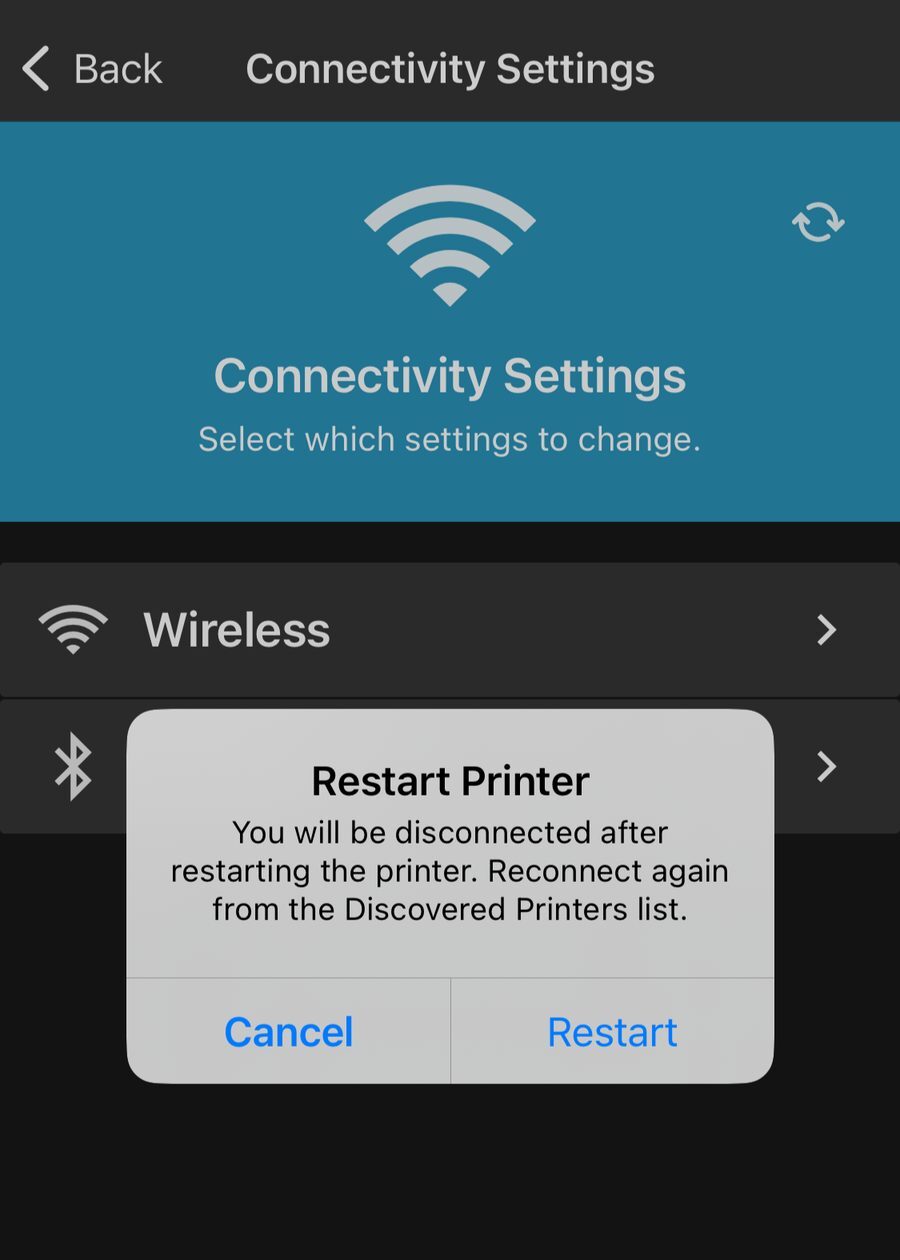
Step 7 Part D:
Type in your WiFi Password then press 'Next'. Then on the next screen press 'Apply'. Finally select the 'Restart' button when prompted.
 |
 |
 |
You have now successfully set up DHCP Connection on your printer. Now you may configure your printer to a permanent IP address after identifying a free IP address from your Wi-Fi router. Once it is permanently assigned, you will be able to use the printer through WiFi commection on your computer or on any other devices connected to the same network.
Step 8: Check Network Configuration
Step 8 Part A:
To find out what IP Address the DHCP connection has assigned to our printer we can print a Network Configuration. To print a Network Configuration simply hold down the middle and right button on the printer for around 3 seconds or until it starts printing.
Step 8 Part B:
At the top of the printed labels you should see the title 'Network Configuration'. Here we can find 3 key pieces of information about our printer's wireless settings that we will need to set up the Permanent WiFi Connection.
- IP ADDRESS
- SUBNET
- GATEWAY
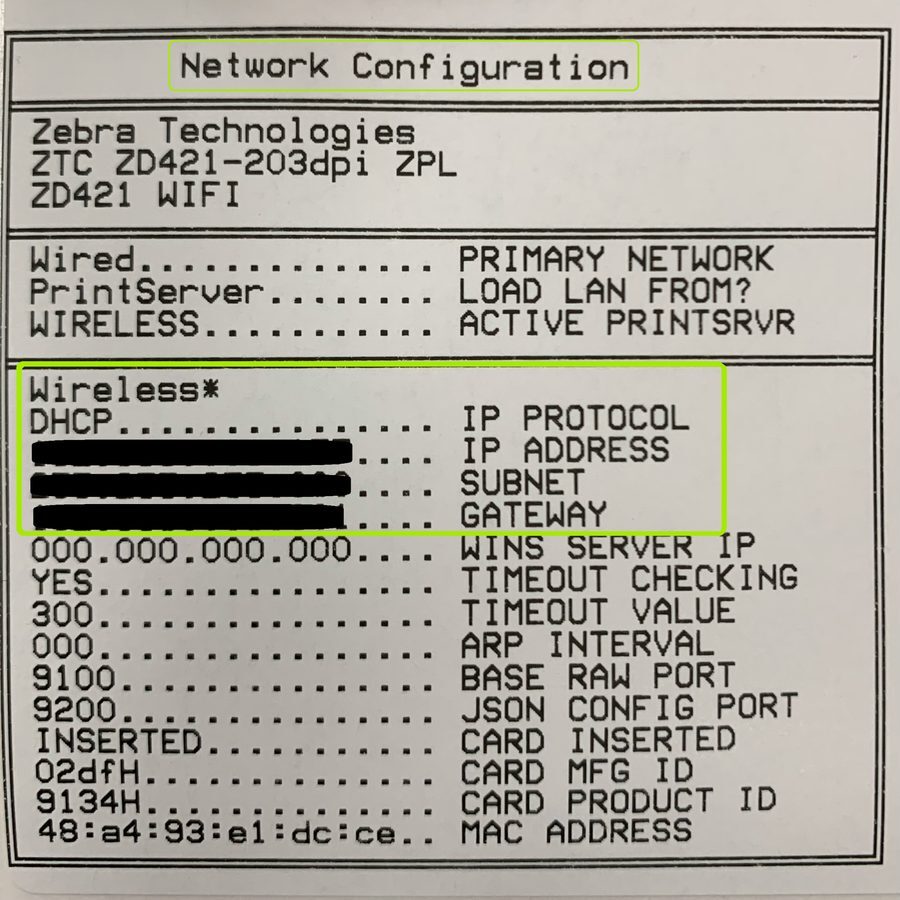
Note: We can also see other information such as IP Protocol and Hostname which we configured on our phone settings. IP Protocol: DHCP, Hostname: ZD421 WIFI
Step 9: Setting up the WiFi Connection (Permanent)
Step 9 Part A:
Go back on the Printer Setup app and refresh the 'Discover Printer' tab. You will now see the printer available to be connected by both Bluetooth and WiFi. You will also notice the name of the printer has changed to what we chose in the Hostname setup.
Select the device available for WIFI connection then select 'Connectivity Settings'.
 |
 |
|
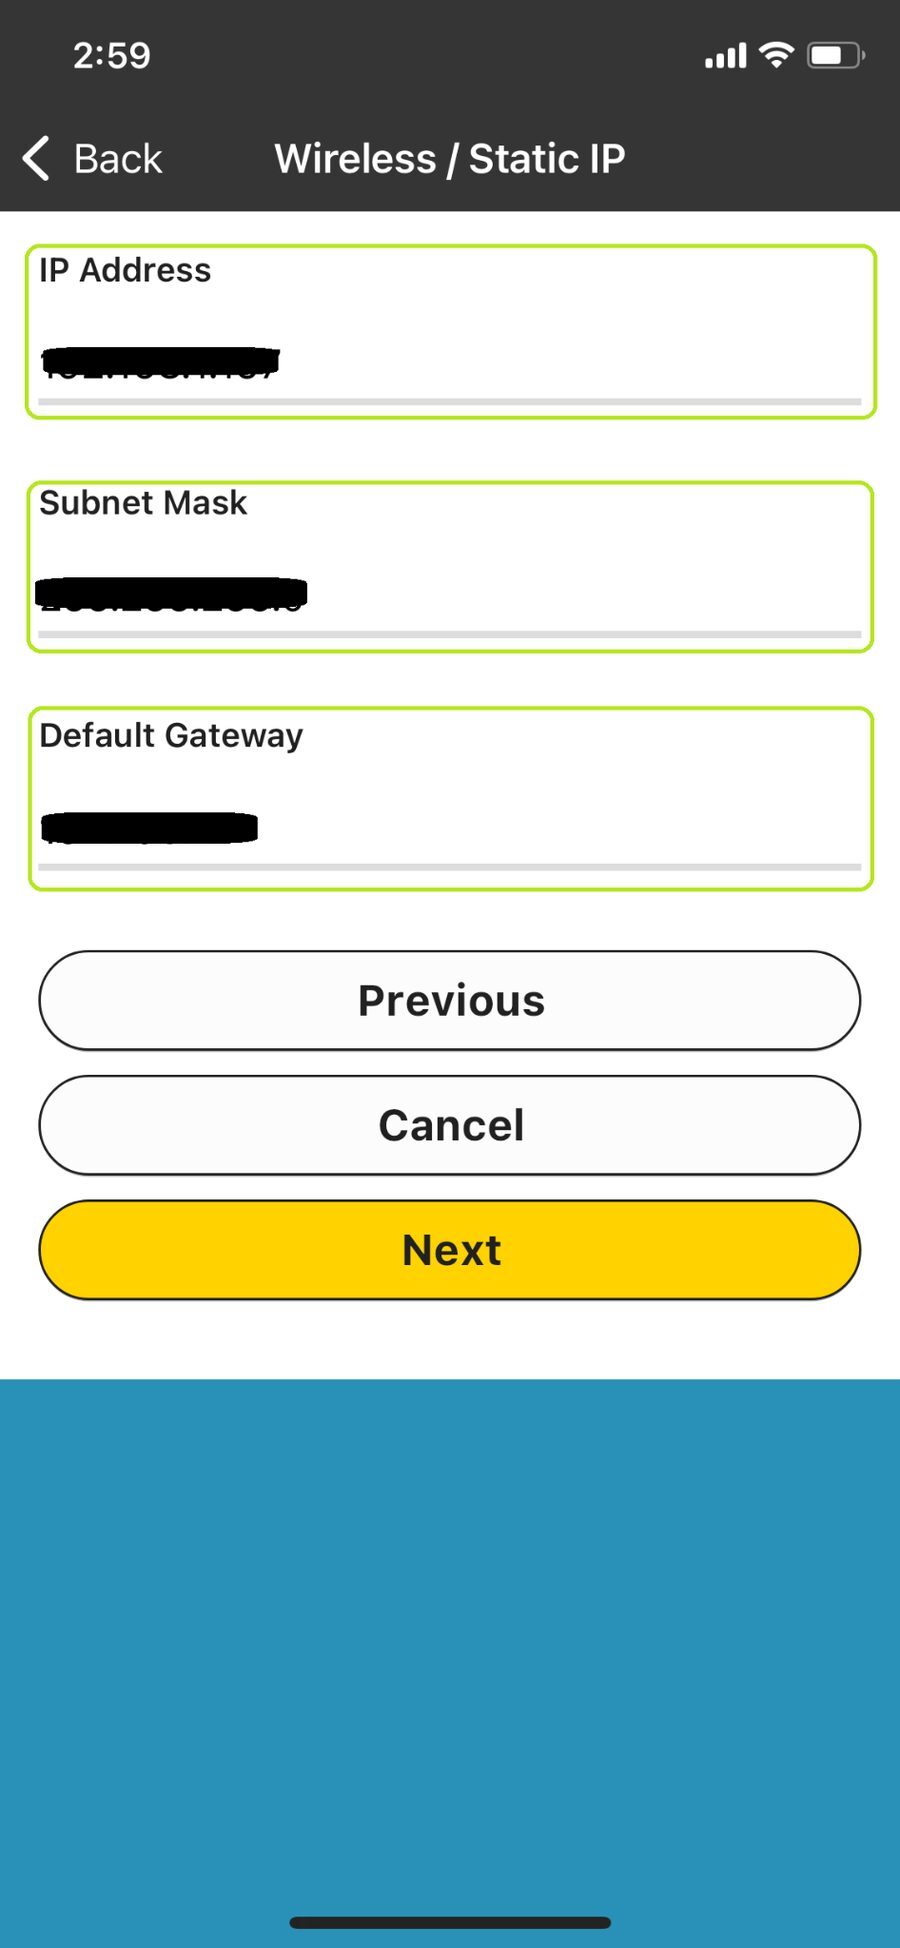
Step 9 Part B:
First we will be changing the IP Addressing Protocol from DHCP to Permanent. Next the step asks to set an IP Address, Subnet and Default Gateway. If these are already filled out, check that they match the Network Configuration numbers from Step 8. If not then manually enter the code that you printed in Step 8. Your code should look something like the following (X's are replaced with your results):
- IP ADDRESS……192.168.XXX.XXX
- SUBNET……255.255.255.XXX
- GATEWAY……192.168.XXX.XXX
 |
 |
Step 9 Part C:
After this point the rest of the steps should be identical from Step 7 Part B to Step 7 Part D. Follow through the steps making sure everything is filled in the same as before. Once the printer has restarted (through your phone prompt) the printer has been successfully set up on your network and can be operated from your phone.
WiFi Setup on Computer
Note: You must have already set your printer up through the phone app before connecting it to the computer. Otherwise you must follow a separate method by connecting your printer to your computer via USB.
The setup through the phone gave the printer a set IP address which the computer can recognise through the network. The following steps are to install the correct drivers on the computer so it can operate the printer.
Step 1: Download and Install Zebra Setup Utilities
Download from the official Zebra website and follow the install commands:
https://www.zebra.com/ap/en/support-downloads/printer-software/printer-setup-utilities.html
Step 2: Add a Printer in Zebra Setup Utilities
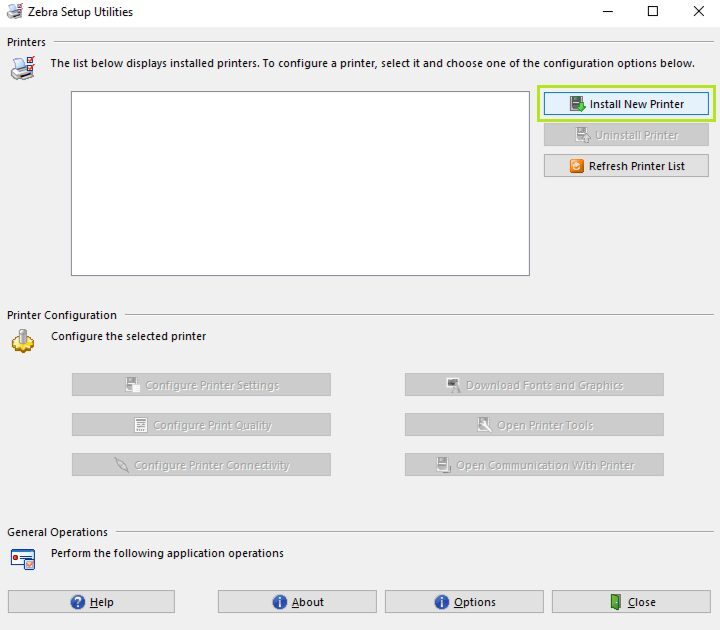
Step 2 Part A:
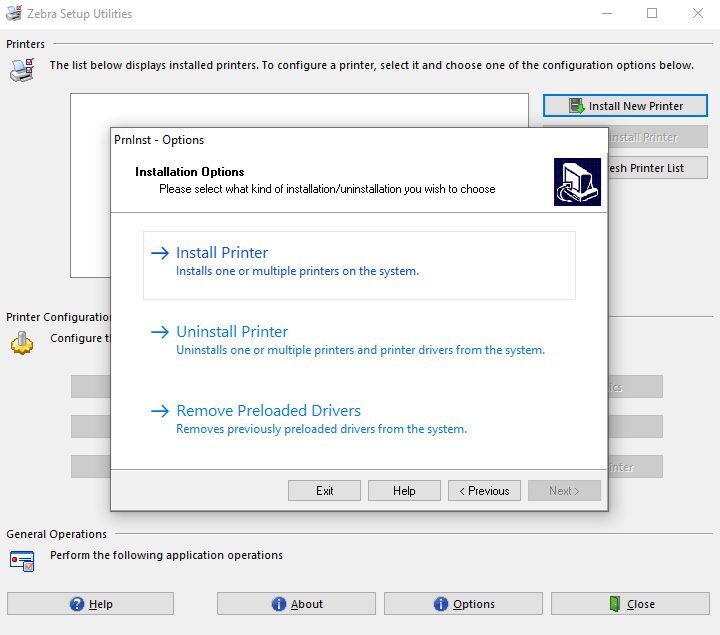
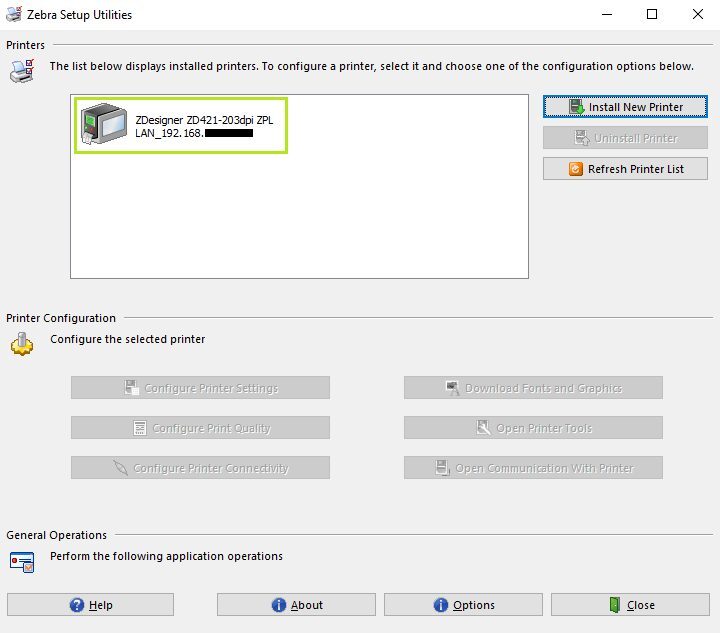
On the homepage of the Zebra Setup Utilities select the 'Install New Printer' option in the top right corner of the screen.
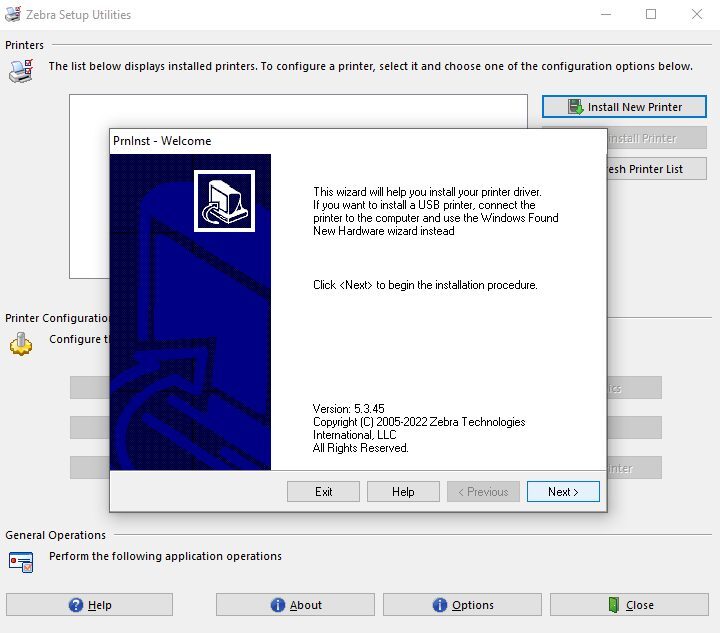
Step 2 Part B:
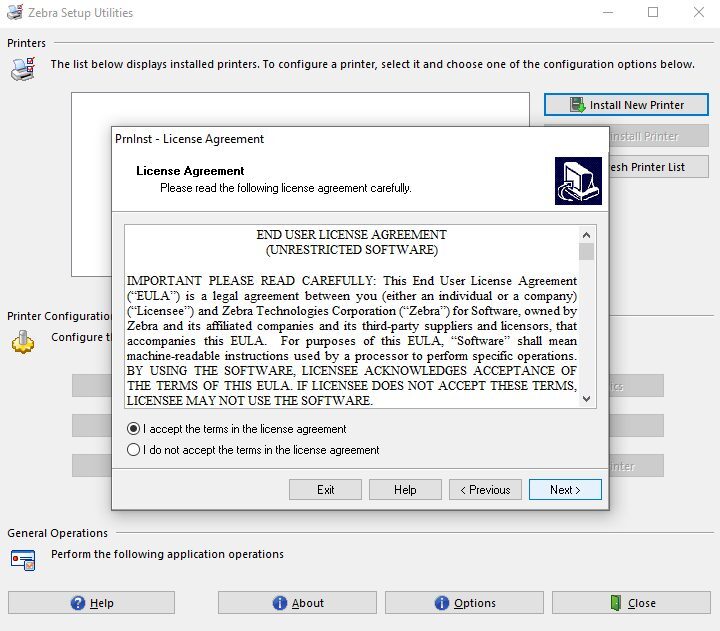
Select 'Next' on the Wizard Installation. Select 'Install Printer'. Select 'Agree' on the Terms & Conditions.
 |
 |
 |
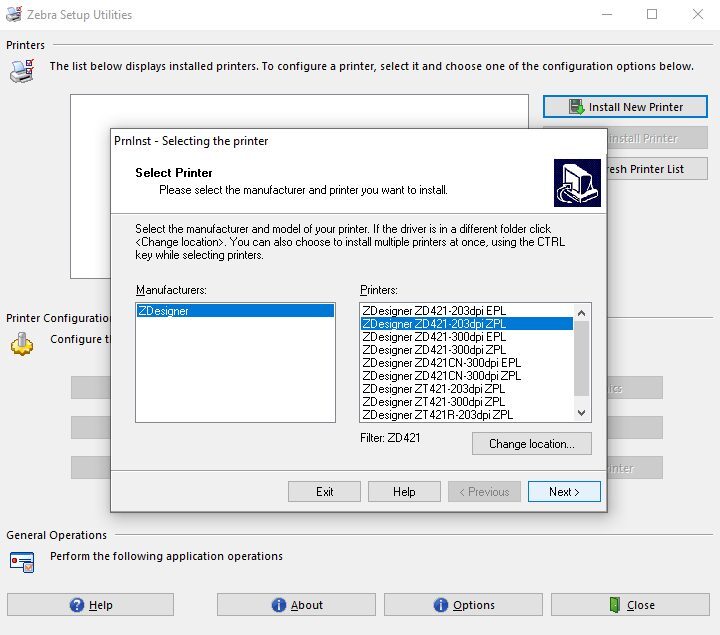
Step 2 Part C:
Select the model of your printer to install the appropriate driver. The ZDesigner ZD421 - 203dpi ZPL has been used in the example below.
Note: As there will be many driver options available, you will have to scroll down to find the correct option. Alternatively you can type in your printer model to quickly filter to the correct option.
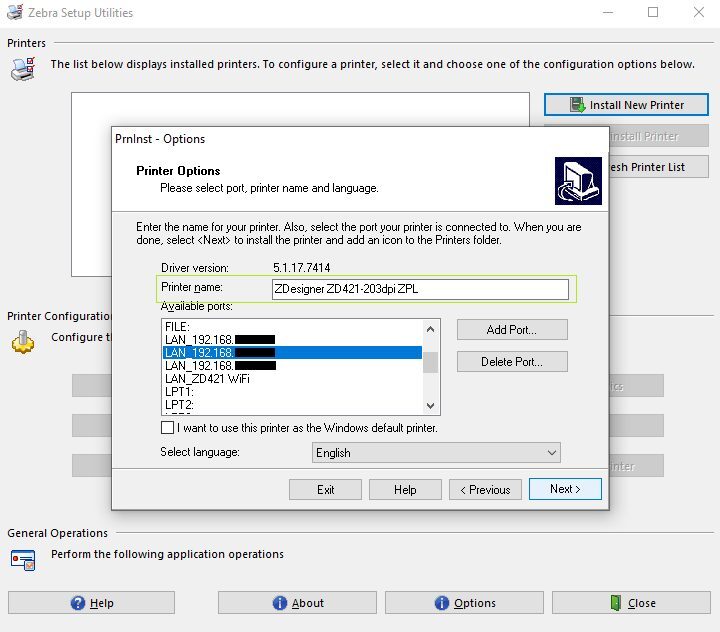
Step 2 Part D:
Select a port and printer name. The port is the printer's permanent ID address. Select "Add Port" and enter the permanent IP address configured earlier.
For 'Printer name:' you may change it to a custom name such as "ZD421 WIFI."
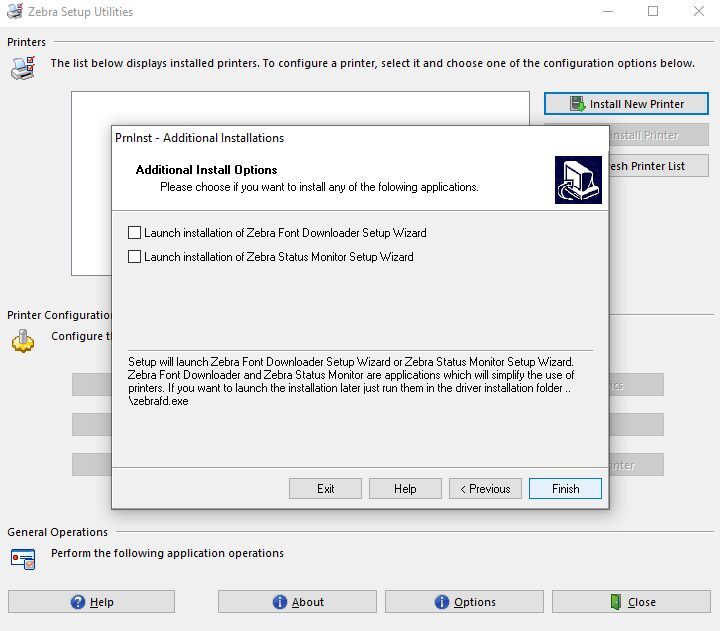
Step 2 Part E:
Uncheck the "Launch installation of Zebra Font Downloader Setup Wizard" as it is not important for now. You can download/launch this at a later time if needed.
Then click 'Finish' to finalise the installation.
 |
Step 3: Test Printer Connection
Run a quick test print to see if your printer has been connected successfully.
Step 3 Part A:
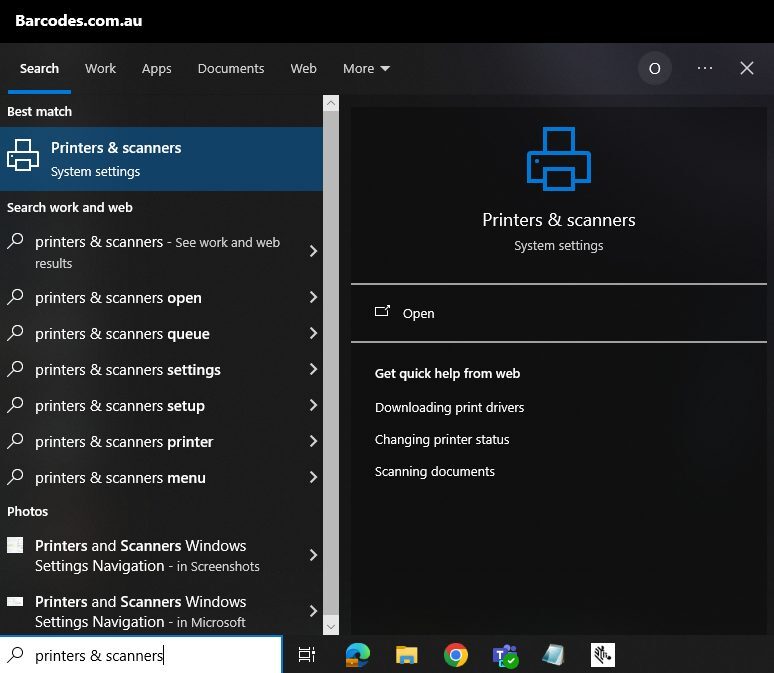
Go to 'Printers & scanners' in Windows system settings, by typing 'Printers & scanners' into the Windows search bar found at the bottom left corner of your desktop screen.
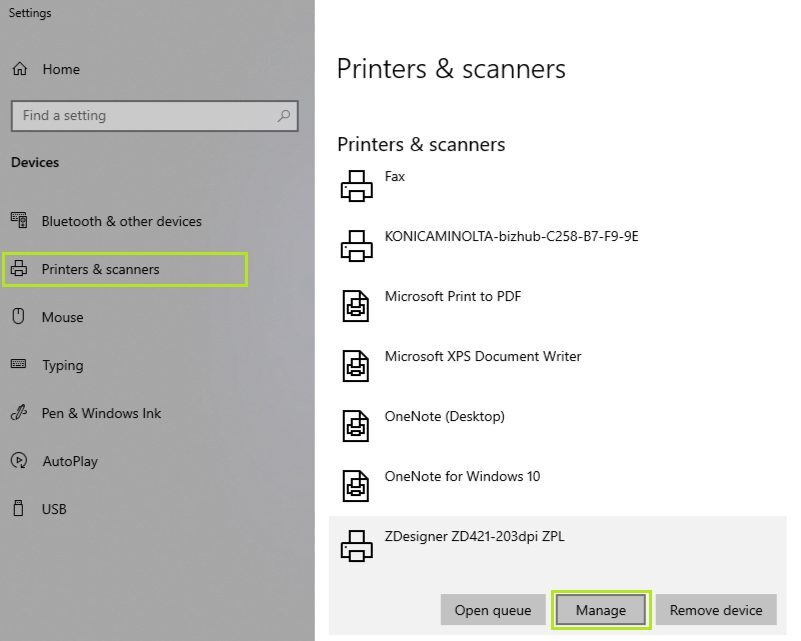
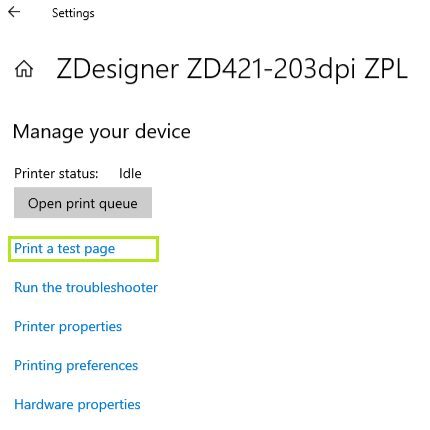
From Printers & scanners you should be able to see the printer you have just set up (ZDesigner ZD421-203dpi ZPL). If you cannot see the printer straight away try refreshing and waiting for a minute.
Click on the printer name, select 'Manage' and click on 'Print a test page'.
 |
 |
Need help setting up your ZD421 or looking for compatible labels and ribbon? Contact our team on 1300 800 999 or email us at sales@barcodes.com.au